Monday, August 29, 2011

Happy Birthday to me!!!

I thought, since I start celebrating my birthday tomorrow, even though it's early, I thought that I would reward you all, my followers with an early celebration, too!

From now until September 30th, 2011, use the following coupon code to get a whopping 25% off your purchase in my etsy shop! Wowzers!! The mini code is only available to y'all now and will be made available to the public later in September. Get a fast move on things you want and look for new stuff soon!

And to make it even better, it's in both of my etsy shops!!!


Find my minis at LyssasBudgetMinis or find my real size paintings at LyssaWynCreations.

This sale includes discounts on my custom paintings!

Place an order soon to celebrate with me! The celebration being, of course, you get some rocking art and I get some genuine green dough. :D


Also, remember there are two more days to sign up for the giveaway!! Link is in the sidebar.

Thursday, August 25, 2011

Sealing on the Ceiling

After some consideration, I decided to go with a ceiling treatment that was suitable for a cottage, but a little different than the normal ta-do. Enter the paneled and beamed ceiling:


Clearly, the bottom floor ceiling isn't angled like this, but I really liked the look of it. After some consideration and consulting with Brae, I decided to just use the original kit wood, instead of strips or what not.

So I took the ceiling piece out to the garage and attacked it with the dremel. First, I used it to cut out a new stair hole, since the would now look quite silly in what is the kitchen. :) They will be in the middle area of the house, which will present an awkward bedroom layout, but I am okay with that, really.

Then, at every half inch mark, I used the dremel to score the wood, giving the appearance of panels. They aren't perfectly straight, but that's okay, too. Then I took square dowels and cut them in half length wise so they would be 3/16" thick. Each one was then cut to the appropriate length of the room. (This is where I was in love with my new table saw!) These, also rough, but it adds to the realism? Old cottages were made by hand, not with fancy doodad machines that make beams perfectly square. :P

Then it was back inside to frame the ceiling with 1/8" inch square strips. I also framed around the stair hole and the former stair hole. I plan on building up on that later with a pot rack or something.

The panels first got a wash of Bittersweet Chocolate by Americana- my favorite color ever. I was a little heavier on some spots and in the cracks.

While that was drying, I used a razor blade to rough up the beams a bit more and then painted them in Bittersweet Chocolate, too.


Then I painted it, the paneling and framing, White Wash by Americana and attached the beams.


Looks pretty awesome, right?


Too bad I measured something wrong and it didn't fit right!!!


******** Please enjoy this pleasant picture while I rip my hair out***********


Okay, so after some venting and talking with my dear friend and Twin Pea, Brae, I started fixing the problem by using her suggestion of a soffit.

First I measured everything again to to get the wall to be in the right spot. Then I pried several pieces up off the wood (thanks goodness I used GlueAll!) and made the appropriate cuts.

I relaid the edges of the channels and then rechecked to make sure I hadn't messed up AGAIN before I moved on.


Then I cut up a cereal box (mmmmhhhmmm, Cinnamon Toast Crunch) to be nearly two inches longer that then the depth of the floor, making an almost 12" strip. Then I folded at the 1" and 11" marks to make little folded tails on it. I ended up cutting these later to make a nice 90 degree angle corner.

These were then secured with 1/4" square dowels by gluing a piece on the end and at the corner.


Then I glued some down the length to stabilize and make it as straight as possible. This whole piece was then glued into place over my initial mess up.


Once it was glued down, I cut two strips to fill in the sides. I secured this all with masking tape, since I planned on covering it anyway.

I still had paper left from the corresponding wall, so I covered it with that and blended it in.


I may install lights in it and a register to make it look like duct work. :)

I like how this looks and probably owe my days sanity and the continued survival of my house to Brae. Thanks, Pea!!

And here is a shot of the kitchen with the new ceiling:

Tuesday, August 23, 2011

Cozy home and a Fab Find

After much work the last two nights, I got the exterior siding all done on the Orchid and papered the interior walls for the bottom floor. It's coming along and looks fabulous! I am so happy with how it is turning out. :)

Below the white trim line will be a rock/stone foundation. I should get started on this soon since my amazing friend, Brae, of otterine.com, is sending me egg cartons. So nice to have great friends!

When the gables go up, I am not sure if they will get the board and batten, too, or if they will get another treatment. This is also the wall that will be getting a chimney on it. Still not sure how to work that out though....

It's in dry fit! This always makes me feel awesome. After I get the ceilings done tonight (fingers crossed) then it will get glued together. Need to put the back piece in, too, and probably supports on the bottom floor underside to keep it from bowing under the weight of furniture.


My cozy kitchen. I adore it. White paneled walls are made from the same veneer on the outside and painted with Shiny White paint Folkart. The wallpaper is from Jennifer's Printables site. The floor is skinny sticks that I parqueted, stained walnut and then washed with white several times. Before final instillation of it, I am going to ding it up a bit. :)


The living room. The stairs will end up right in front of the door. The wallpaper is from Jennifer's Printables Site and some scrapbook paper. The floor is made from craft sticks, stained Bombay Mahogany by Miniwax.


And look what I found in my stash?! Didn't even know I had this stuff! I found this hilarious since Brae had just been looking for two of these items recently. Silly me not knowing my inventory! Especially for that table. I had been eyeing one exactly like it on Ebay and I didn't even need to! Gah!


Here is the first layout in the house! The table and chairs are staying, but the fridge and the sink are place holders. Check back soon to see what should be in their place! ♥♥♥♥


And remember to enter my giveaway if you haven't already. I'm celebrating reaching 100 followers and it's still open for another week. :) Go here to enter your chance for some food and baskets!

And be on the lookout for my coupon for my birthday discount in both my Etsy shops! Will be made available when I announce the winner of the giveaway.


Sunday, August 21, 2011

A Little Iron-on Siding

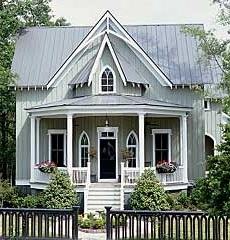
Looking at my inspiration photo and several other cottages, I realized I wanted to do vertical siding. The best way to go about this, I thought, was by using Band-It Iron-on Veneer Strips. The roll is typically 3/4" by 25' long and is right around $6.50 at the big box stores. I used Red Oak, but this link is for White Birch. If you go visit Band-It's website, you will see that they have many different woods and even sell in sheets. This is a great product and it is really easy to work with.

I started with the outer wall to the kitchen-sanding it smooth with 220 grit sandpaper. A super smooth surface makes for uniform application!


I put a strip of scrap wood near the base of the house (where the tabs/slots are) to be a thick divider between the boards and the eventual rock/brick base.

Then, I measured a strip of veneer from the bottom edge there up to the top; cut it and held it in place with the clamp. I repeated this process until the wall was covered.


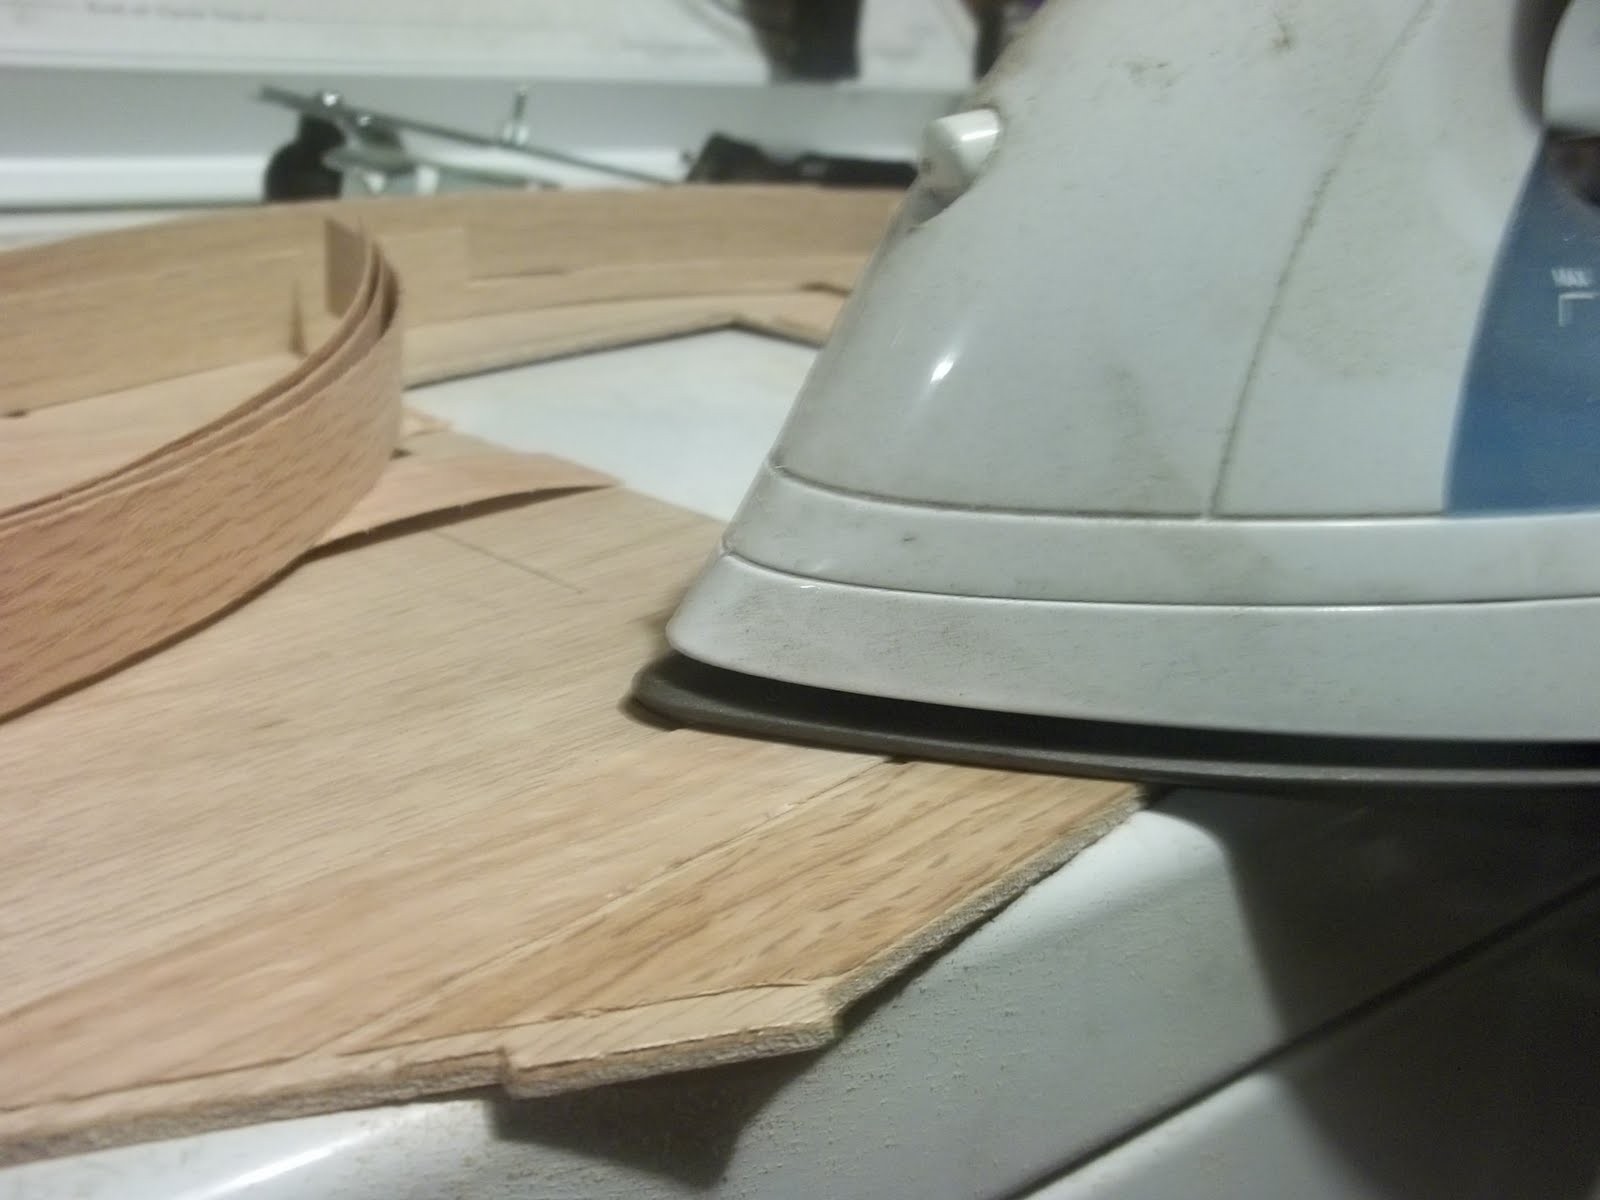
Then it was out to the garage!


With my iron on a medium dry setting, I began to press the veneer in place. It is important to press and not rub like you would with your clothing. You don't want to push the veneer around on the freshly melted glue- you'll just frustrate yourself to no end. After they are all pressed into place, it is okay to rub around on them, making sure they are all smooth.


All the pieces are on!


Now to putter around in the garage while it cools off. ♫ ♫ ♪ ♫ ♪

Once I was back in the studio, I started with a wash using White Wash and Slate Gray by Americana. Paint a strip, wipe it off. Paint a strip, wait thirty seconds, wipe it off.


Then back in between the gaps to give it a little richer color.


Final wash product:


My next step was to put some color on it, using Glidden paint test color French Country Blue. In case you have not heard of the Glidden testers (like I hadn't, a year ago) they look like this:


and you can find them in Hope Depot in the paint aisle with the paint chips. Martha Stewart has some, too, but she only has a few colors at a time-although, her sample size is larger.

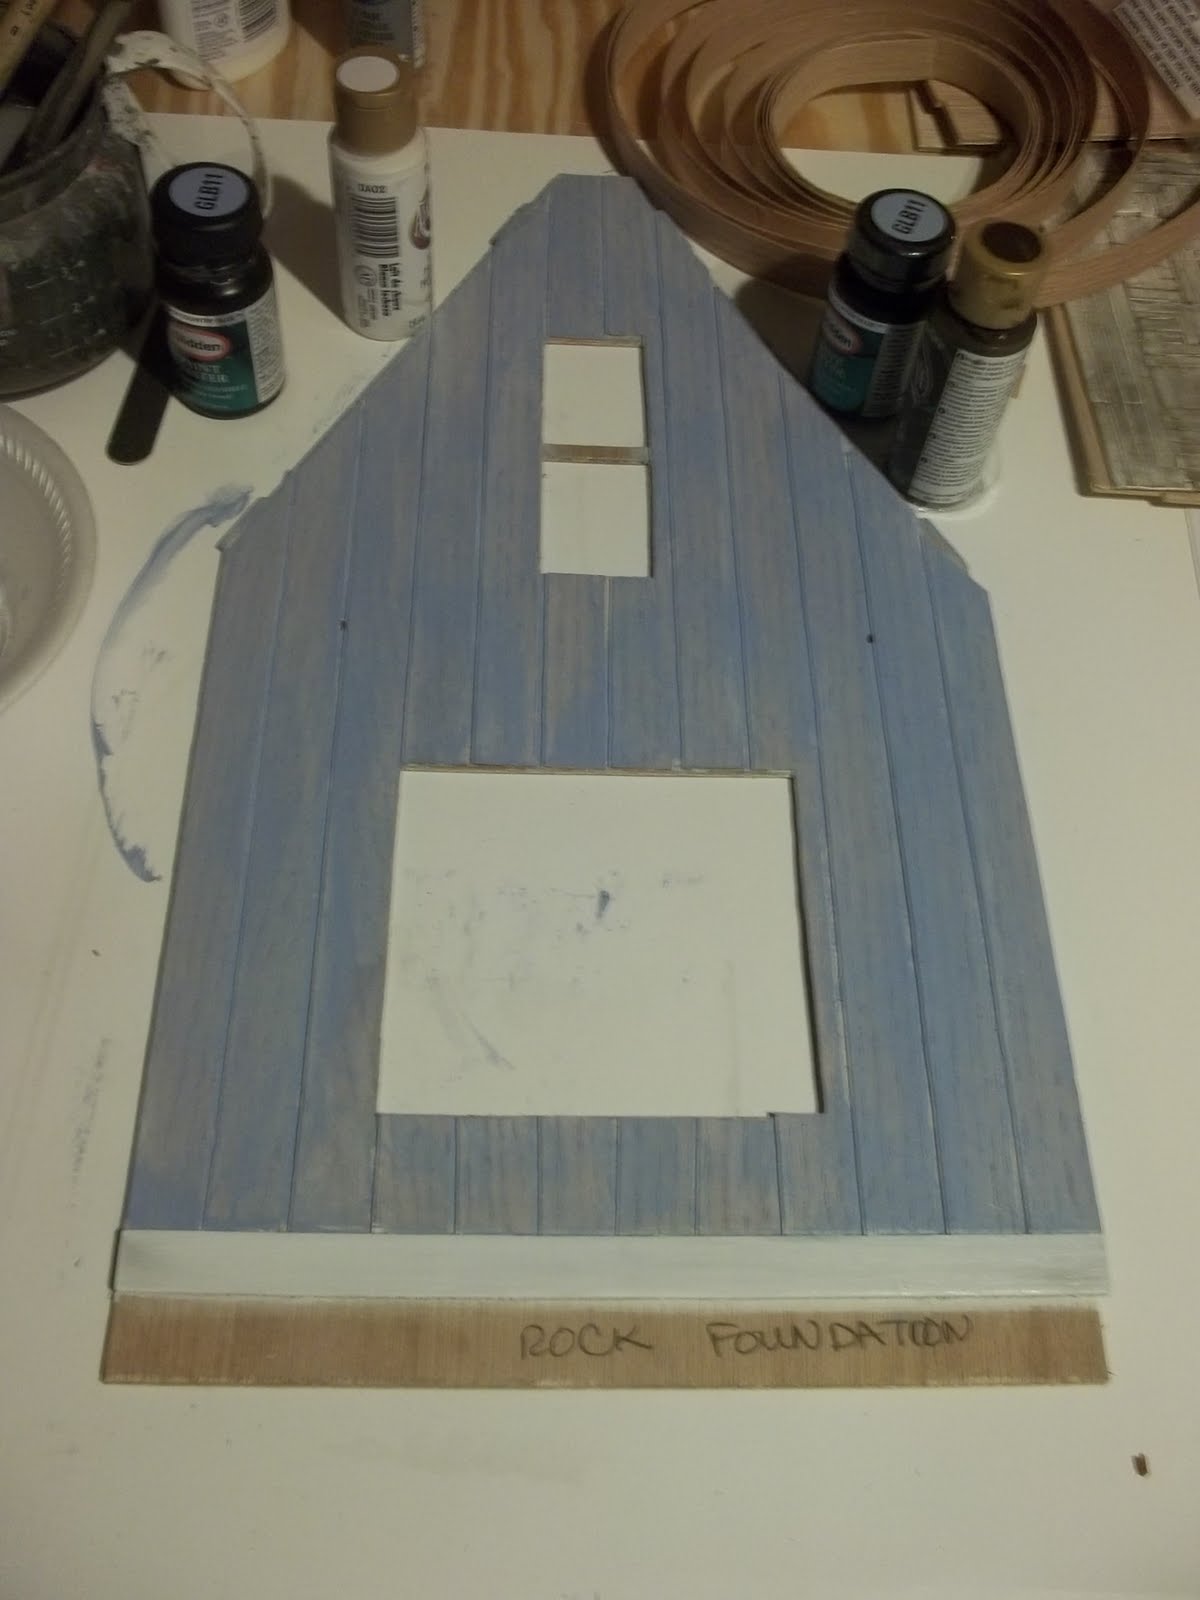
I used the same technique that I did with the wash, but I used it full strength, not watered down.


Finally, the strip wood at the bottom got a couple coats of paint and light aging.


I'm really happy with this look and think the end result will be amazing. I might use some crackle medium to rough it up a bit more, but I'm not sure about that yet. The Orchid is a tricky house to put together, so I think the next step is to finish the other outer walls.

See you soon!

Saturday, August 20, 2011

Old Time Country

Since the Fling ended, I have been working on a project idea I've had laying around for months now. I've been gathering supplies since I bought the house (an Orchid) and I am really excited to start putting things together. I plan on having a cute and quaint, thought aged and weathered, country cottage. This photo is from a magazine I have (Cottage Living) and it was part of my inspiration. I'm debating on giving the Orchid a similar porch! My house will have a bluer color to it, but still feature a gun metal colored metal roof like this:


The house will have a small fireplace and a cozy living room with shelving under the stairs. I will be moving the front door so it is not in the center of the porch or right in front of the stairs on the dividing wall. I also switched the walls so that the bay window, which will feature a herb garden in it, is on the left side of the house (right side of this picture). As for the fireplace, I haven't decided if the chimney will be just out of the roof or on the side of the house.


The kitchen will have minimal appliances and open shelving like this below. I love the wood paneled look and will probably go with that, too. I might even make these dishes! They are so cute! I can work on accessories right now while I wait for birthday goodies to come in. :) I have that iron on wood veneer on my list.


I am on the hunt for a table for two that is just right for eating in the kitchen. There will be an overall shabby feel to the house and blue theme throughout. Guess I should get cracking!

Remember to enter my giveaway that is good for the rest of August. Click the link here to enter.
And next month, I will be having a sale in BOTH of my etsy shops to celebrate my birthday. Celebrate with me and get savings on my already budget minis or life size paintings.


Tuesday, August 9, 2011

100 Followers Giveaway!

It's that time again! Time for a giveaway.

I'm so excited, and I bet you are, too.

The giveaway will go from now until the end of the month, August 31st. Drawing will be held and winner will be notified on September 1st.

To enter: Be a follower and comment on this post between now and the deadline. Only one entry per participant, please.

Feel free to post a link in your own blog. :)

Now, the prizes!


Two handmade baskets. They are made out of paper! A spider plant. Two Bonnie Lavish pansies. Two rolls of paper towel. Assorted food (corn, watermelon, tomatoes, apple, broccoli, carrots and potatoes) to go in big basket.

This was a first for nearly all of these things. I have made the plant before, as well as the paper towels. I just recently sent some to Brae at Otterine.com.


Monday, August 1, 2011

Upcoming Events

My birthday is coming up! (September 1st) This always make me happy, and not for the obvious reasons (though I do enjoy presents!), because it means the holidays are just around the corner. I absolutely adore autumn and all the things to do. :) Fairs, pumpkin patches, funnel cake, golden colors (but not here in FL), cooler weather (also, not here in FL), decorations, crunchy leaves and the potential for business. Autumn is when my Christmas commissions start coming in.

So, here's the skinny. When I reach 100 followers, I will have a giveaway and someone will get to celebrate my birthday with a present of their own. Actually, I may do it for more than one person. Look for that coming up.

Also, September will mark a BIRTHDAY SALE in BOTH of my Etsy shops. In September, save 26% on your purchase (in honor of my turning 26, of course).

Again, look for these things to be happening in the coming days and weeks.


I would also like to welcome all the new followers as of late. Sorry I have not acknowledged you sooner! There are a bunch of you!

  • Minitures by Natalia
  • Keli
  • NarinaNapertaa (I don't know how to do the fancy letters, forgive!)
  • RosaMargarita
  • Josje
  • Heather
  • MM
  • Cherryv33
  • Jody
  • Plushpussycat
  • Caraloo
  • Carmen
  • Pepper
  • Elis
  • Susie B
  • Jaana
  • MariaIreland
  • ultsu
  • Cecilia Colo
  • Sonyait68
  • Dales_Dreams
  • Peggy
  • Eva Krog
  • Il Cucchiaino Magico
  • May
  • Barbara Emerson
  • Marian
  • islabcn
  • Ana Anselmo
  • ursula.kernst
  • lataina
  • Fabiola
  • lluna45
  • Isabel (morgana35)
  • Katiana
  • Kelli
I think the list stops at Ani. She was my last giveaway winner. :)

Welcome all of you! Click among each other, because there are some fabulous blogs out there!