I finished the contest entry and will be sending in my photos here shortly. Cross your fingers for my win!!! I think that would just be so cool. As much as everyone likes my artwork, I haven't ever won a contest with it and this will be my first Miniature Contest. I'm so stoked that I entered!
I also finally took pictures and posted for sale on Etsy several items. The couch and chair set, several mini paintings and a set of paints with a brush.
You can go see them all and maybe get a little something, something here. I hope to make an easel and put it up by the end of the week.
I am also finishing up a surprise additional gift for my friend Randi. Need to down some coffee and turn the rest of it out tonight so I can ship it off tomorrow. She is so excited, I only wish I could be a fly on her wall and actually SEE her face when she gets it. :)
Alright... I need to go feed my bottomless pits. Every time I turn around ONE of them is hungry. Oi!
Wednesday, September 29, 2010
Sunday, September 26, 2010
Just Popping in with a Looksie, Welcome, Thank you!
First of all, I would like to welcome everyone whom is following my blog. I really appreciate it! Whenever we get up to an arbitrary number or something significant, there will be a substantial prize.... as there will also be for the first person to pony up and buy something off my Etsy shop. *hint hint, wink wink, nudge nudge* :)
Thank you for checking in on my work and for all your kind comments, encouragement and praise. I like hearing from the people that I consider professionals that they admire my tiny creations.
Finally, a quick looksie here for y'all. I just finished that painting I was working on and thought it should be shown off... since I can't show the mini I am working on now. It's hush-hush until after the contest. :)
I am very happy with the results of both projects and I hope to get back to work on the Highland here in a few days.

Thursday, September 23, 2010
Non-mini New News
So, here is what has been consuming my time as of late. I am not done with it yet, but since I want to surprise the recipient with the finished product, I am showing it off to everyone else!!! Look for a finished product post next week sometime!


Tuesday, September 21, 2010
Hackity hack hack...the FLU!! September 18th and 19th
I was sick this past weekend, so my great plans to be all productive in the mini world and the general area of crafts was totally thwarted by my illness. It is ridiculously hard to craft whilst you are hacking and choking and suffering from delirium caused by Nyquil, BUT I did it anyway. :) What can I say, I am an addict.
So, I will first have you reassured that I did not put my safety in question. This meant a big no-go on the power tools, so I don't have garage doors or new front doors yet. BLAST!!! I did, however, work on a few little things for the terrace.
1) The railing! I had these tiny little stick dowels in my box of DO NOT THROW AWAY THESE SCRAPPY PIECES OF WOOD, THEY *MIGHT* BE USEFUL ONE DAY!!! I spaced them to match up with the piece of plastic wrought iron fence I have (after everything was painted black, of course). I then used some fast grab and a toothpick to assemble all pieces: sticky things, a bigger sticky things, tiny square "feet"

2) I made some plants.
~ A hanging spider plant made out of floral tape. What an unbelievably tedious job. Ugh. But it looks cool. **** High on Nyquil mistake: Everything is assembled and hung up and I love it, BUT I forgot to bake the clay. BLAST!!!

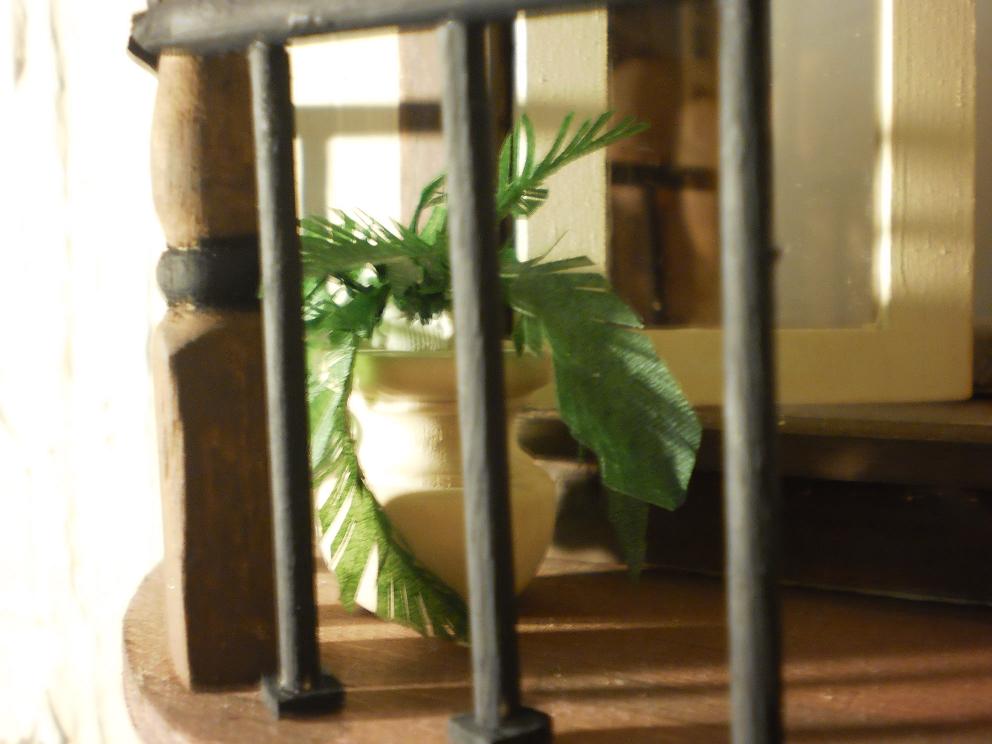
~A potted fern made out of floral tape. Also tedious, but just as cool. Never actually painted the pot. Sigh.

~ A hanging wicker basket! This is my favorite. I sorta fudged this tutorial for a Flower Gathering Basket and bent the sides up to make a basket... then used hemp cord for the ropes, wound some wire in there to make a hook... filled it with some stuff and moss and TA-DA!!


That is all that I have done in the last little bit. Mostly on Sunday night after I was totally bored with sleeping. I had slept for something like 20 hours....
Hopefully, this illness is on it's way out the door and I can move on to more enjoyable things!
So, I will first have you reassured that I did not put my safety in question. This meant a big no-go on the power tools, so I don't have garage doors or new front doors yet. BLAST!!! I did, however, work on a few little things for the terrace.
1) The railing! I had these tiny little stick dowels in my box of DO NOT THROW AWAY THESE SCRAPPY PIECES OF WOOD, THEY *MIGHT* BE USEFUL ONE DAY!!! I spaced them to match up with the piece of plastic wrought iron fence I have (after everything was painted black, of course). I then used some fast grab and a toothpick to assemble all pieces: sticky things, a bigger sticky things, tiny square "feet"

2) I made some plants.
~ A hanging spider plant made out of floral tape. What an unbelievably tedious job. Ugh. But it looks cool. **** High on Nyquil mistake: Everything is assembled and hung up and I love it, BUT I forgot to bake the clay. BLAST!!!

~A potted fern made out of floral tape. Also tedious, but just as cool. Never actually painted the pot. Sigh.
~ A hanging wicker basket! This is my favorite. I sorta fudged this tutorial for a Flower Gathering Basket and bent the sides up to make a basket... then used hemp cord for the ropes, wound some wire in there to make a hook... filled it with some stuff and moss and TA-DA!!


That is all that I have done in the last little bit. Mostly on Sunday night after I was totally bored with sleeping. I had slept for something like 20 hours....
Hopefully, this illness is on it's way out the door and I can move on to more enjoyable things!
Wednesday, September 15, 2010
She got skillz....
...is what James so cleverly said to his mom when I took all the recent stuff over to her house tonight. I feel fairly certain that line is in a BoysIIMen song.... or maybe it is the song..... Anyhoo, I have been doing some piddling here and there on stuff and made a few more things. Yesterday I steadily worked on paintings and I still have several that need to be framed.
I should be working on the RL sized painting, but I am to the point where I need to not be interrupted because I will be making custom colors. This is hard to accomplish with small children running amok.
Last night, I cut all the pieces and parts I needed to make a scrolling love seat and this morning, I put it together. That is it for now. Darling husband FINALLY brought home the jigsaw so I can get to work on cutting out some parts for the Highland. I should get back to work on that in the next couple of days.
I also procured some red leather from DHF. I think I will surprise him with a library room box for Christmas. :) That should be fun. This whole mini adventure is taking over my life!!!! But, I feel like it is getting the best of all my talents (not to toot my horn or anything) and I am enjoying myself immensely. :)
Till I have more!


Monday, September 13, 2010
Sick baby means a slow day of mini's
Charlie is sick at the moment and pretty much took up my whole day with cuddling and doctors. He has a double ear infection, but should recover quickly since we caught it so soon. Instead of sleeping during nap time, which is what I surely should have been doing, I made these miniature paintings. They will go up on my Etsy shop.
They are hand-stretched canvas on a skinny stick frame. The paintings are also hand made and of my own design. I love the space theme paintings and started practicing them when I saw a Street Painter doing them with spray paint in Kissimmee, Florida. The sunset is a rendition of the very sunsets I saw off of my porch in Moscow, Idaho, when I was growing up.


They are hand-stretched canvas on a skinny stick frame. The paintings are also hand made and of my own design. I love the space theme paintings and started practicing them when I saw a Street Painter doing them with spray paint in Kissimmee, Florida. The sunset is a rendition of the very sunsets I saw off of my porch in Moscow, Idaho, when I was growing up.


Saturday, September 11, 2010
Tutorial! How to make an arm chair!
This is my first tutorial and I am sure that I made a few mistakes. Hope you can follow it all right!
Items you will need:

Now, we should be ready to set up. I don't have pictures of cutting everything out, I had it all ready done, but I do have measurements for you.
1. You will need to cut out several pieces of the FCB: 2 pieces for the bottom, 1 seat cushion, 1 back, 1 back cushion, 2 arm rests.
2. Start by gluing to bottom pieces together. NOT the cushion. Center the smaller bottom piece onto the larger one. Spread glue evenly and then clamp. Set aside to dry.
3. While drying, you can cut your fabric for the other parts of the chair.
4. For the base and the cushion, cut a square that is an 3/4" larger all the way around.

5. For the armrests, cut 4 pieces total that are 1" by 2". These pieces will cover the ends of the armrests.
6. Also for the armrests, cut 2 pieces that are 3 1/2" by 3 1/2". These pieces will wrap and cover the armrests.
7. For the back and cushion, cut a piece that is 3 1/2" by 6" This will cover your entire back piece.
8. You will also need equal sizes of padding material if you wish to use it. It could be the foam package wrap stuff that I use, or it could be thin layer of sponge. Cut them just larger than the seat cushion and the back pieces. Also cut 2 pieces the same size as the armrests. These will be used for cushion on top of them.
9. Have everything assembled and cut? You should have all your tools, plus 5 assembled pieces of foam board, fabric for each piece and padding if you are using it.
To start!
10. Take your, now dry, assembled bottom piece and place it small side down onto its appropriate piece of fabric. Run a line of glue on the bottom outer edge, and on the edge of the FCB itself.
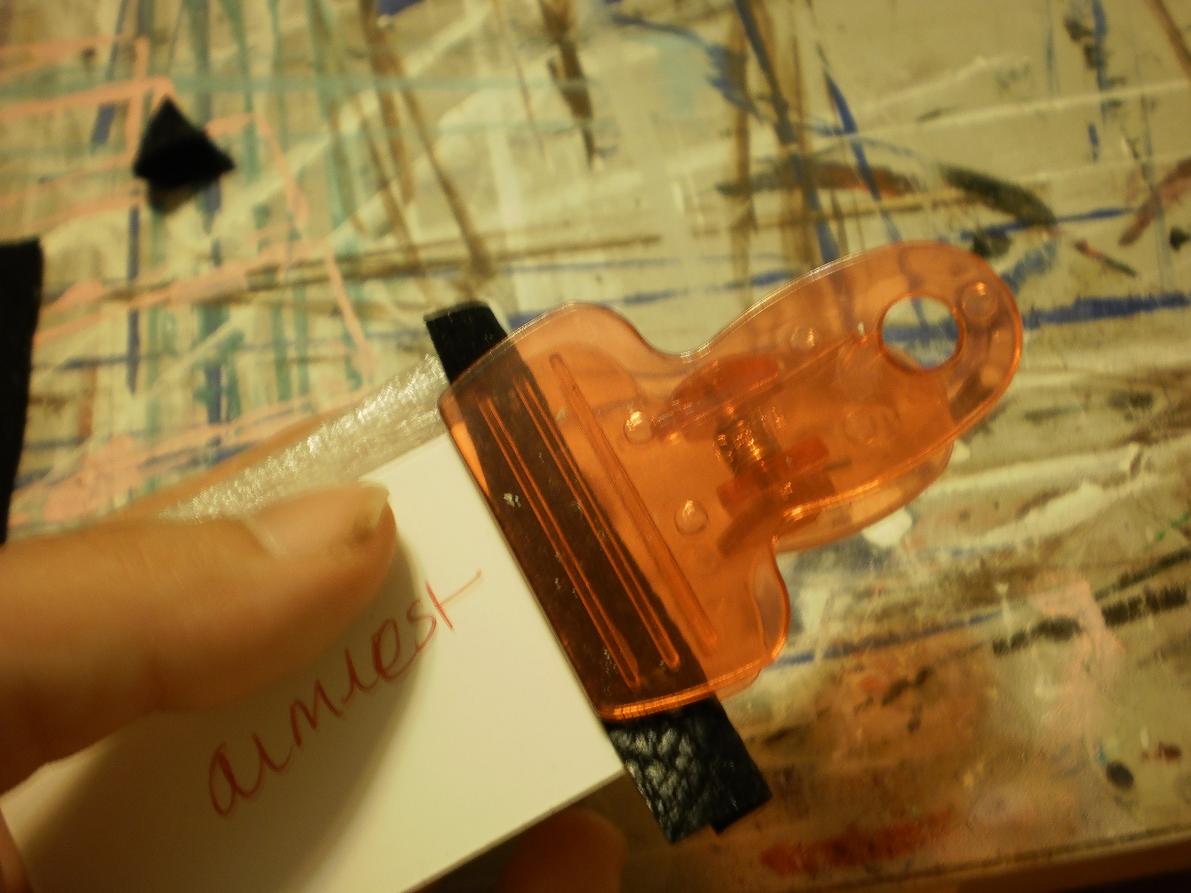
11. Pull the corresponding edge of fabric up and press down onto the glue. Secure with several fabric pins, like so:

Repeat for opposite side and make sure you pull tight to avoid unsightly wrinkles later on.

12. to secure the sides, run a line of glue on the edge and then fold in the corners like you are wrapping a present. If your fingers are clumsy, this is where the skewer comes in handy. A third arm here, would have helped take better pictures! Secure the corners with two more pins.


13. Take a pair of scissors and cut off the extra fabric that has created the dog ears. Do not place your scissors all the way flush with the FCB! that will leave exposed edge!

14. Currently, your base piece should look like this:

15. Run a line of glue on the FCB to secure the fabric on the end (pull over like wrapping a present) and hold in place with pins. Repeat for other side and pull tight.

16. Finished base should look like this:


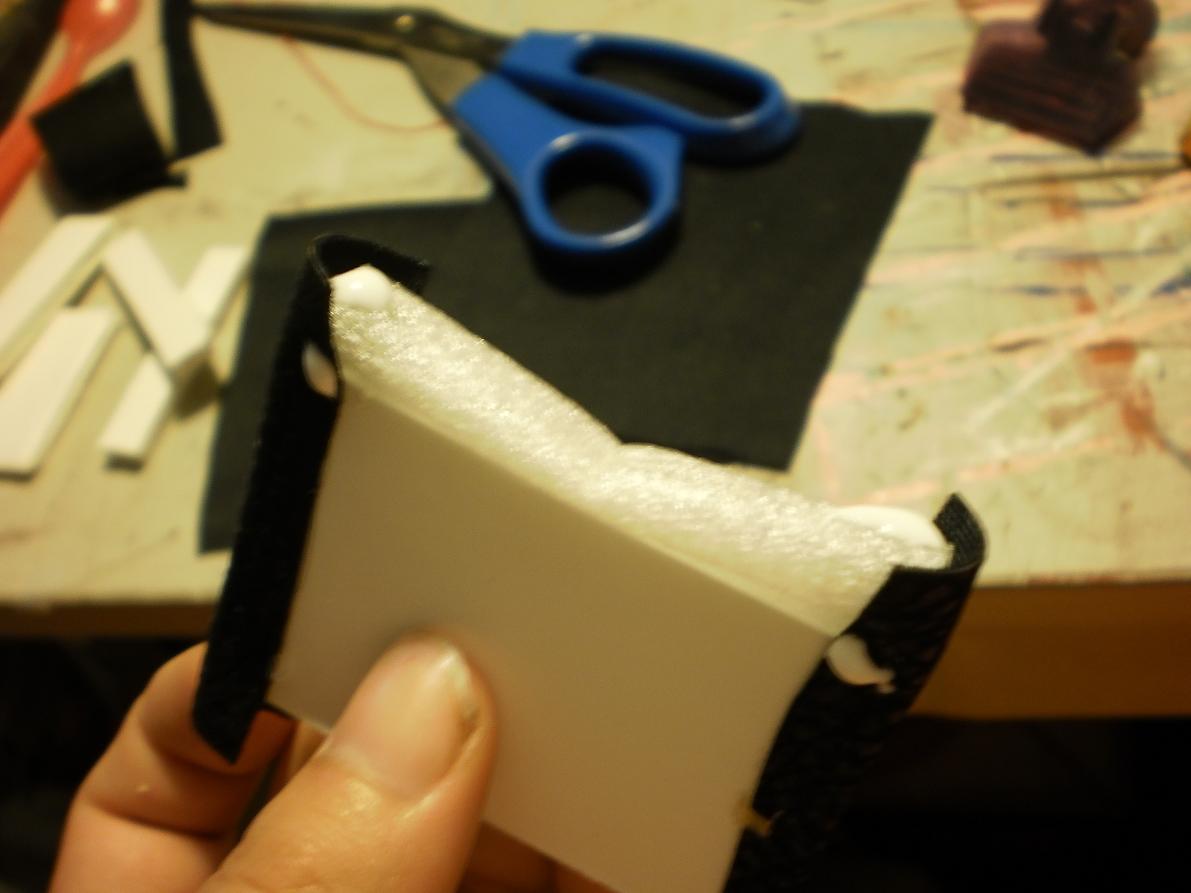
17. To do the seat cushion, place your padding material between the FCB and the fabric. Repeat steps 10-17 and you will end up with this:


18. The seat back with cushion will be placed in the bottom half of its piece of fabric. Allow it to have roughly the same amount of fabric on the bottom edge and two sides, like this:

19. Start off the same way you did with the other two pieces by gluing the bottom edge. Then take your fingers and push the extra fabric on the bottom left down like so:

20. I do not have a picture of this process. I needed a third arm! You will run glue along the edge , up to, but not on, the curve. Do this on the top of the FCB as well as the side. Then secure with pins again. ***SEE THE RESULT PICTURE TO CLARIFY BEFORE APPLYING GLUE!!

21. Repeat on other side. You can always use small clamps to help you out with a tighter fit. :)

22. For the armrests, if you are using some sort of padding you will use this to make the squishy top.

24. Place the side cover on it, like so, and secure with pins or a small clamp. I used a clamp because it seemed easier. (You can get these at Dollar Tree).


25. Repeat 23 and 24 on the other side and the other armrest. Set them aside to dry.
26. Go back to work on the back piece. It should be dry enough by now. You are going to put just a little bit of glue up in the round corners and then smush them in. Fold up the fabric like you would wrap a present.

27. Put glue all down the sides and edge where the new layer of fabric will go and then pull the fabric down and secure it. Always remember to pull tight!

28. Use several pins and adjust the tension of the fabric until it is as smooth as possible. You can do touch up gluing when it is dry.

29. If you have over flow of glue, use the skewer to scrape it out and a damp cloth to wipe it off as much as possible. If there is extra fabric, like mine has, cut it off.

30. While drying, your back piece will look something like this:

31. Now go back to your armrests. There will be a bit of fabric sticking up from both ends. On the top, on the squishy stuff, put a small dot of glue. You need to glue this part over so that it will run under the general cover of the armrest and give that nice clean look. Clamp or pin it in place. Repeat this on both sides on both armrests.


32. Go do something while your armrests dry. :)
33. Now you are ready to wrap your armrests! Take the corresponding piece of fabric and lay your armrest on it:

34. Fold over a good amount on one side:

35. Line up and glue. Then clamp to dry.

36. Fold back the other side, so that you can fold it under and do the same thing. Run glue down both sides, pull tight, clamp to dry. Set it aside and do the other one the same way.


37. Pull the fabric tight, glue and pin as you did with the back piece. Run a line of glue on the very bottom edge and full the fabric across. Pin tightly into place. There will most likely be extra. Trim that off with your scissors.


38. While those are drying, go back to your other pieces and do any touch ups to the fabric that you may want to correct. Remove pins from those pieces. Do the same to armrests when they are dry.
Assembly!!!!

39. To assemble cushion and base, glue unfinished side to unfinished side. Clamp to dry.

40. Armrests go unfinished side (where you trimmed off the excess) in. Line up the front edges with the front edge of the cushion and base. They may stick out a bit farther in the back, but this is okay. There is a raise to the back cushion to accommodate this. Place glue on the cushion/base, press armrest against it, secure with pins. PUSH THEM IN FLUSH.


NEARLY THERE!!!!
42. For legs of chair, cut 1/4" or 3/8" (whichever you prefer) sections off the dowel. You will need four. They can be painted, stained, varnished.... I left mine plain for now. Glue them to the bottom of the chair like this:

TA-DA!!! You have a scratch built arm chair for your modern house!

A matching couch can be made by just changing the length of the base and back. To make the couch with chaise, like I have, make and "L" shaped base, cushions to match and you will need 8 "feet."
Hope you enjoy! Share pictures with me if you follow the tutorial and I always welcome feedback. :)

Items you will need:
- Foam core board
- Fabric
- Scissors
- Tacky glue
- Ruler
- Utility knife
- Silver fabric pins
- 1/4" dowel
- skewer to help poke fabric in
- clamps
- package foam wrap (for seat padding, optional)

Now, we should be ready to set up. I don't have pictures of cutting everything out, I had it all ready done, but I do have measurements for you.
1. You will need to cut out several pieces of the FCB: 2 pieces for the bottom, 1 seat cushion, 1 back, 1 back cushion, 2 arm rests.
- 1 bottom piece is 2 1/8" by 2 1/4"
- 1 bottom piece is 2 1/8" by 2 1/8"
- 1 bottom cushion is 2" by 2"
- 2 armrests 2 3/8" by 1 3/8"
- 1 back 2 5/8" by 2 7/8"
- 1 back cushion is 1 15/16" by 2 3/8"
2. Start by gluing to bottom pieces together. NOT the cushion. Center the smaller bottom piece onto the larger one. Spread glue evenly and then clamp. Set aside to dry.
3. While drying, you can cut your fabric for the other parts of the chair.
4. For the base and the cushion, cut a square that is an 3/4" larger all the way around.

5. For the armrests, cut 4 pieces total that are 1" by 2". These pieces will cover the ends of the armrests.
6. Also for the armrests, cut 2 pieces that are 3 1/2" by 3 1/2". These pieces will wrap and cover the armrests.
7. For the back and cushion, cut a piece that is 3 1/2" by 6" This will cover your entire back piece.
8. You will also need equal sizes of padding material if you wish to use it. It could be the foam package wrap stuff that I use, or it could be thin layer of sponge. Cut them just larger than the seat cushion and the back pieces. Also cut 2 pieces the same size as the armrests. These will be used for cushion on top of them.
9. Have everything assembled and cut? You should have all your tools, plus 5 assembled pieces of foam board, fabric for each piece and padding if you are using it.
To start!
10. Take your, now dry, assembled bottom piece and place it small side down onto its appropriate piece of fabric. Run a line of glue on the bottom outer edge, and on the edge of the FCB itself.
11. Pull the corresponding edge of fabric up and press down onto the glue. Secure with several fabric pins, like so:

Repeat for opposite side and make sure you pull tight to avoid unsightly wrinkles later on.

12. to secure the sides, run a line of glue on the edge and then fold in the corners like you are wrapping a present. If your fingers are clumsy, this is where the skewer comes in handy. A third arm here, would have helped take better pictures! Secure the corners with two more pins.


13. Take a pair of scissors and cut off the extra fabric that has created the dog ears. Do not place your scissors all the way flush with the FCB! that will leave exposed edge!

14. Currently, your base piece should look like this:

15. Run a line of glue on the FCB to secure the fabric on the end (pull over like wrapping a present) and hold in place with pins. Repeat for other side and pull tight.

16. Finished base should look like this:


17. To do the seat cushion, place your padding material between the FCB and the fabric. Repeat steps 10-17 and you will end up with this:

18. The seat back with cushion will be placed in the bottom half of its piece of fabric. Allow it to have roughly the same amount of fabric on the bottom edge and two sides, like this:

19. Start off the same way you did with the other two pieces by gluing the bottom edge. Then take your fingers and push the extra fabric on the bottom left down like so:

20. I do not have a picture of this process. I needed a third arm! You will run glue along the edge , up to, but not on, the curve. Do this on the top of the FCB as well as the side. Then secure with pins again. ***SEE THE RESULT PICTURE TO CLARIFY BEFORE APPLYING GLUE!!

21. Repeat on other side. You can always use small clamps to help you out with a tighter fit. :)

22. For the armrests, if you are using some sort of padding you will use this to make the squishy top.
- For sponge users: take a sliver of sponge slightly thicker than the FCB, same length as the armrest and as tall as you want it .
- If you have the foamy pack stuff, like I did, roll it up to in a cylinder shape and put on top of armrest. Secure in the middle with a pin.

24. Place the side cover on it, like so, and secure with pins or a small clamp. I used a clamp because it seemed easier. (You can get these at Dollar Tree).

25. Repeat 23 and 24 on the other side and the other armrest. Set them aside to dry.
26. Go back to work on the back piece. It should be dry enough by now. You are going to put just a little bit of glue up in the round corners and then smush them in. Fold up the fabric like you would wrap a present.

27. Put glue all down the sides and edge where the new layer of fabric will go and then pull the fabric down and secure it. Always remember to pull tight!

28. Use several pins and adjust the tension of the fabric until it is as smooth as possible. You can do touch up gluing when it is dry.

29. If you have over flow of glue, use the skewer to scrape it out and a damp cloth to wipe it off as much as possible. If there is extra fabric, like mine has, cut it off.

30. While drying, your back piece will look something like this:

31. Now go back to your armrests. There will be a bit of fabric sticking up from both ends. On the top, on the squishy stuff, put a small dot of glue. You need to glue this part over so that it will run under the general cover of the armrest and give that nice clean look. Clamp or pin it in place. Repeat this on both sides on both armrests.


32. Go do something while your armrests dry. :)
33. Now you are ready to wrap your armrests! Take the corresponding piece of fabric and lay your armrest on it:

34. Fold over a good amount on one side:

35. Line up and glue. Then clamp to dry.

36. Fold back the other side, so that you can fold it under and do the same thing. Run glue down both sides, pull tight, clamp to dry. Set it aside and do the other one the same way.


37. Pull the fabric tight, glue and pin as you did with the back piece. Run a line of glue on the very bottom edge and full the fabric across. Pin tightly into place. There will most likely be extra. Trim that off with your scissors.


38. While those are drying, go back to your other pieces and do any touch ups to the fabric that you may want to correct. Remove pins from those pieces. Do the same to armrests when they are dry.
Assembly!!!!

39. To assemble cushion and base, glue unfinished side to unfinished side. Clamp to dry.

40. Armrests go unfinished side (where you trimmed off the excess) in. Line up the front edges with the front edge of the cushion and base. They may stick out a bit farther in the back, but this is okay. There is a raise to the back cushion to accommodate this. Place glue on the cushion/base, press armrest against it, secure with pins. PUSH THEM IN FLUSH.


- If you do not wish to have the silver brad look from the pin heads, you may always place the whole piece in a vice instead.
NEARLY THERE!!!!
42. For legs of chair, cut 1/4" or 3/8" (whichever you prefer) sections off the dowel. You will need four. They can be painted, stained, varnished.... I left mine plain for now. Glue them to the bottom of the chair like this:

TA-DA!!! You have a scratch built arm chair for your modern house!

A matching couch can be made by just changing the length of the base and back. To make the couch with chaise, like I have, make and "L" shaped base, cushions to match and you will need 8 "feet."
Hope you enjoy! Share pictures with me if you follow the tutorial and I always welcome feedback. :)

Subscribe to:
Posts (Atom)


