The past few weeks were spent working on the kitchen plans. There were several interruptions as one by one, the family came down with the stomach flu. Eeeewwww.
I bounced back and forth between the layout for the kitchen (sketches), the floor (craft sticks again) and the oh so very exciting subway tiles.
First thing was to choose paper for the walls- Doveflower by Bazzil.
Then I worked on the layout (down farther in the post) and then measured out the areas for where the subway tile will be going. The following picture shows an area for the fridge (which I will have to build for it to be proper scale), the counter and the tiled area around the window.
Subway tiles are 3" x 6" in real life, so these are 1/4" x 1/2" in scale. I drew out a whole mess of them on a sheet of white card stock.
I used a cork backed metal straightedge and a brand new exacto knife to cut them out.
This took forevvvvvvvvvvvvvvvvvvvver!!!!!! And I needed a lot of them!
Then I made a point to make guidelines on the paper where I would be putting the tiles. Subway tiles are very uniform and straight and tightly grouted. They couldn't be all wonky....though in some spots, it seemed unavoidable. :/
Gluing gluing gluing.....
So many tiles!!!! When they were all done, to get them all the same color and to "grout" the tiles, I painted the whole area with Snow White (Americana) acrylic paint- two coats and then sealed with Triple Thick.
Here is my planned full wall!!! Mat board and card stock to the rescue!!! The plan is to do white uppers with glass fronts. A paneled hood. White subway tiles for backsplash. Some open shelves. Copper pots. Grey lowers. White and grey granite counter top. And I will "attempt" a stainless steel stove... :D
And here is the floor layout... although I ended up nixing the dishwasher and that counter space. You'll note that there isn't really a plan for the other wall.....
Because I added this fun round pass through!!!! It also has subway tiles there... and I have some plans for some open shelving.... :D
I did the flooring in the same manner as the bedroom, but ran the wood the other direction.
So pretty. Love this floor. Love love love. I get this look by being really picky about the sticks. I get a good mix of smooth ones and rough ones.... and then I also get plain ones as well as ones that have some color variation and grain to them. Install, sand with 60 and then with 300, gently wipe off surface dust and then stain and seal. :)
The subway tile here appears grungy.... but it isn't. It's really hard to photograph though... and I can't wait to see it with all the cupboards!! The hallway is perfect compliment to it, too. The front door is an upgrade and the wallpaper is Olive by Recollections.
This "tile" floor is actually some wallpaper sample I had that I just cut and glued down and sealed with a thick coat of Triple Thick.
I also dressed the bed (but still working on pillows)...
And added nightstands. These are painted and then have fancy headpins as the new hardware. They still need a coat of satin varnish though.
And I made a chair for the corner. It is based on my own real life chair in my room. It's by Saba Italia, from the Chance line. Mine is purple, but I liked this subtle floral print for the mini one. It will get a pillow and blanket draped across it before the build is finished....
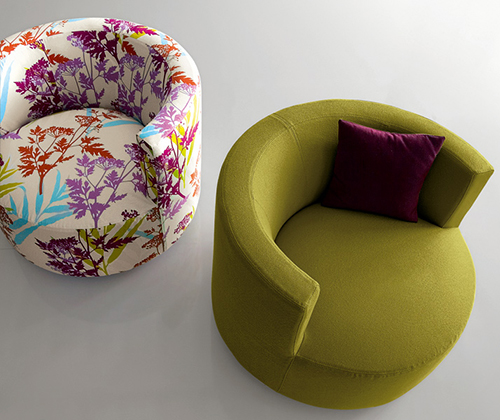 |
| http://sabaitalia.it/en/ |
I hope you have enjoyed what I worked on lately!!! More work on the kitchen coming up soon. And stuff for the hallway, too. ♥


Beautiful work! Go go go!! :)
ReplyDeleteI'm impressed! Love the floor, and tiles, and chair, and...
ReplyDeleteHas hecho un precioso planteamiento en la cocina!!! Los suelos y paredes están quedando geniales!!!!
ReplyDeleteBesos.
Wonderful work, Lyssa, I can't wait to see more! The floors are great, I like the tiles.
ReplyDeleteHugs, Ilona
I enjoyed reading everything. I love the sketch you made for your kitchen. I love the wood floors and that paper tile you installed in the hallway! You have such an uplifting way with colour. I love your style!
ReplyDeleteA cozinha promete ser maravilhosa! Boa sorte nessa nova etapa dos trabalhos! ;)
ReplyDeleteSorry to hear that your family was sick. I love what you are doing for the kitchen! Great plans, and I really like the subway tiles.
ReplyDeleteIts looking great!
ReplyDeleteAwesome! You've done so much! :D
ReplyDeleteWow, what a fabulous design you have made for the kitchen. I look forward to watching its progress. Love the chair design. Looks very cosy.
ReplyDeleteGreat idea for the subway tiles! I really like your overall design for the kitchen. I found it really hard to make upper cabinet door fronts so I look forward to seeing how you create them and hopefully pick up a few tips. :)
ReplyDeleteKristine
it looks great, Im loving that chair :)
ReplyDeleteHugs
Marisa
Gorgeous subway tiles.
ReplyDeleteThat's awesome! I love the chair a lot, I might have to make one of those. I've never seen that style of chair before, and I really like it. And by the way, your flooring is amazing!
ReplyDelete