I did it! I can't believe among everything I had going on this Winter/Spring that I actually finished, and the results, well, I couldn't be happier. This little house has come a long long way and I am going to share every fantastic detail with you.
I picked this house up off of Craigslist for, less than $20... it might have been as little as $10, but no matter the cost, the price was right. This poor house needed a solid rescue. All crooked, over painted and drowned in hot glue.... I couldn't wait to fix her up and give her new life.
The house set on a shelf for quite a while as I worked on other houses, projects and Mt Ollopa. When I finished up
Mt Ollopa,
Brae suggested that I enter the
Undersized Urbanite contest, hosted by Little Victorian, with her. It occurred to me that the little Tennyson house would be perfect for it... main structure already there, but still totally bashable.
As I have stated before, but will repeat for new followers, I love to use miniatures for home design ideas that I cannot use in my own house (mostly because I don't own it... and I would have to run the ideas by my husband...) I decided to tackle the Tennyson with a bunch of home decor ideas I had on my various Pinterest boards. I had style plans, paint colors, funky shelves, cool lighting, out of the box wall treatments... all sorts of things ferreted away. You can see all my original ideas
HERE and any that didn't get used, you can be certain that you will see them at some point!
And after 4 months, the Tennyson went from this:
To this:
And from this:
To this:
I replaced and added walls, changed windows and doors, replaced railings and more.
Let's start with the outside first, since it is the most recently finished.
One of the things I get the most compliments on is the details that I put into my houses. They look lived in and cozy. Warm and inviting. I don't think the outside is any less than that!
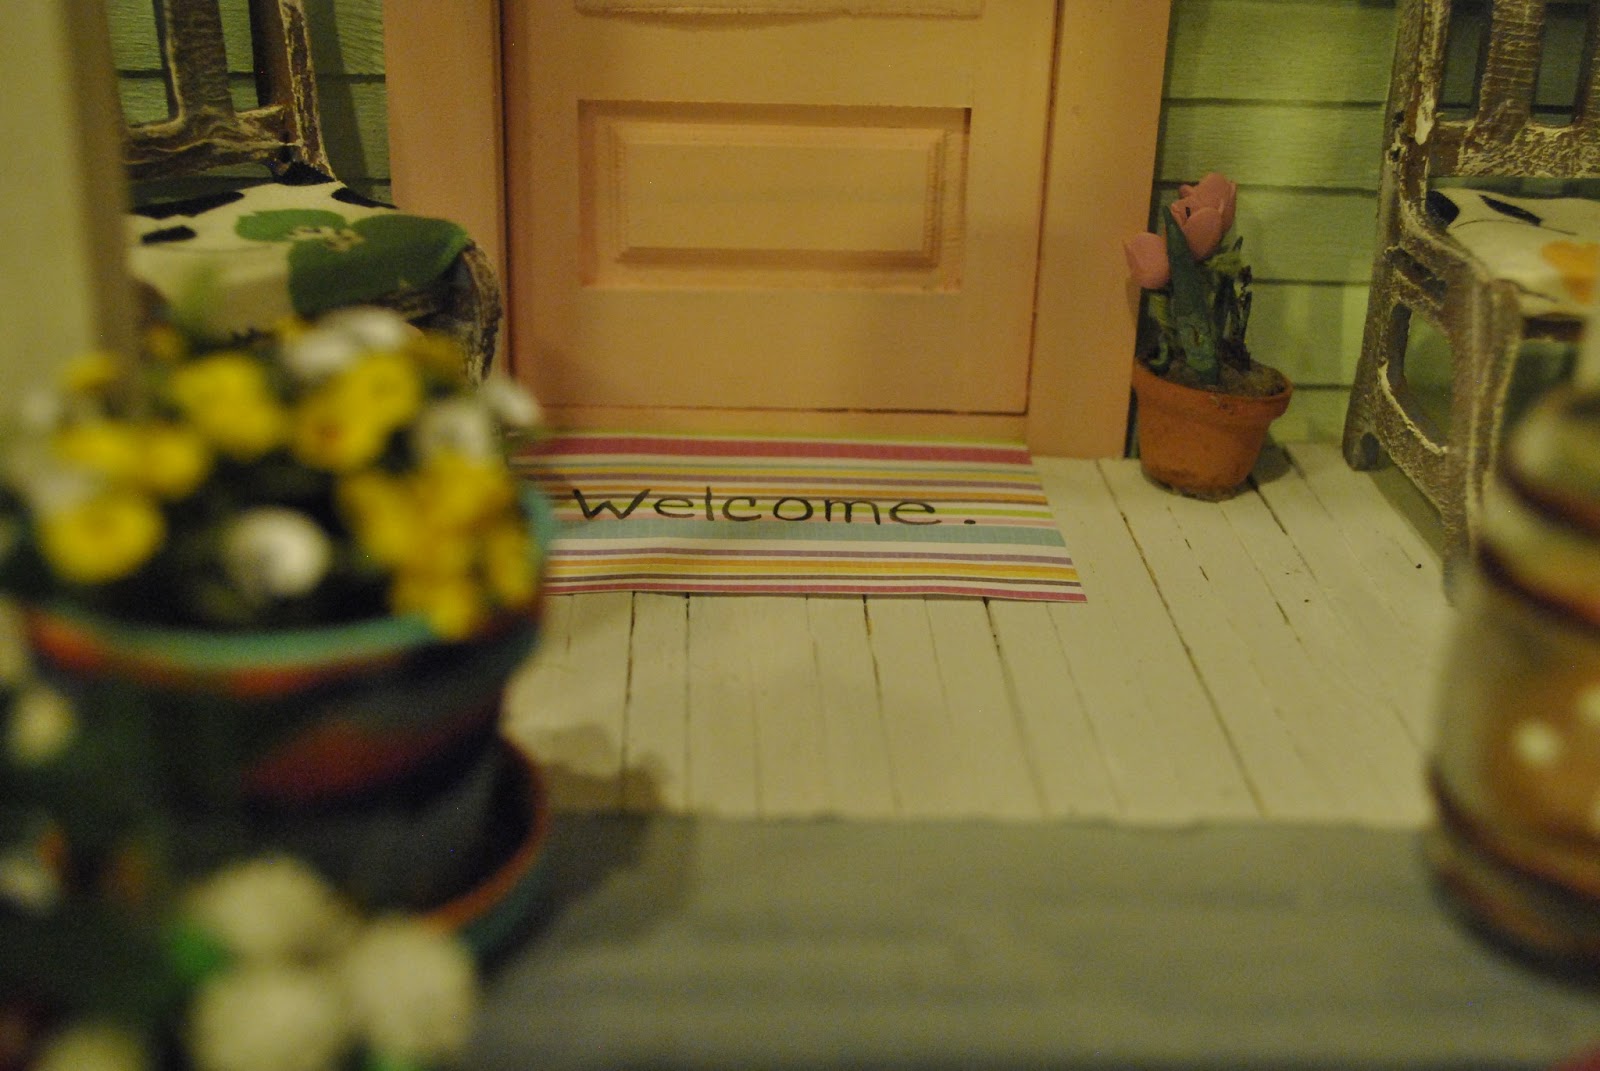
You are greeted at 712 Sparkleberry Trail by a sidewalk and a charming walkway, lined with flowers, groomed lawn and many colorful pots.
Sit in the Adirondack chairs out front and enjoy a glass of lemonade while the neighbors garden and the kids play nearby.
Sunflowers are blooming! Don't you just want to stuff your face in one?!
I chose the house number based on my relationship with my husband. The amount of years we have been together, married and kids.
I wanted an eclectic set of flower pots to reflect all the ones that I see in stores, but never have the money to buy.
Even the welcome mat is colorful!
I LOVE THIS GUY!!! Yet another thing that I want to have in real life, but haven't found one that I loved and also loved the price. I drew this little dude out on cardstock, cut him out and then used the bottom of a sharpie to round him appropriately. Finally, I threw 2 coats of Triple Thick on and then waited for him to dry.
It's amazing the random things I can find in my crafting drawers, like this little frog. I made the border fence out of silver floral wire. The pathway there is a SHINGLE sample from Lowes!
What seems to be a hit amongst my girlfriends is the detailed painting on the railings. It was a pain and took two days, but it really is worth it! And I got to watch a lot of Bones while doing it, so Win-Win!
I also put a few of my paper birdhouses in the yard and mounted them on base sticks.
And now, we move on to the inside.
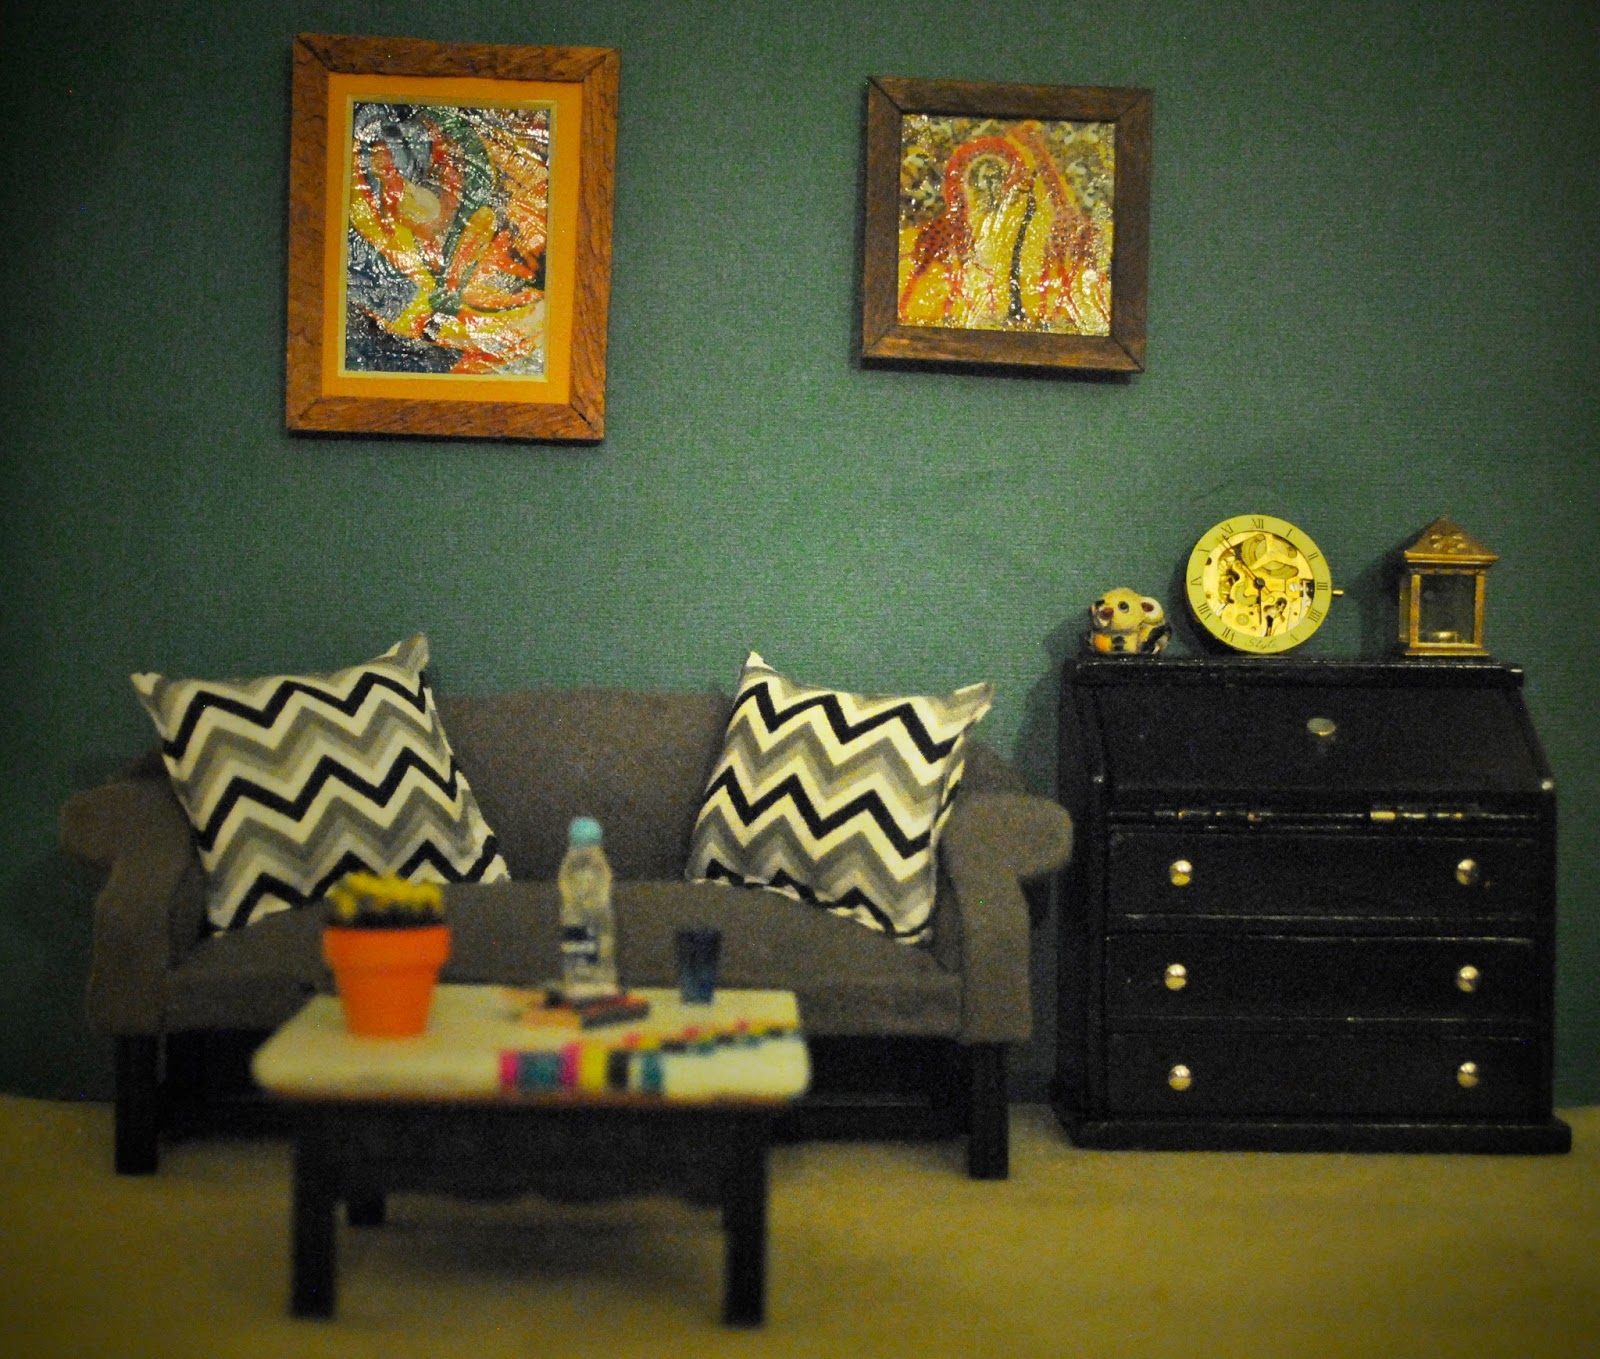
THE LIVING ROOM:
Started out like this, over painted, over glued, with double doors, awful stairs and shelf liner flooring...
And I turned it into this:
There isn't one thing in this room that I am dissatisfied about. I love it all. And what isn't scratch built, was given to me by other mini friends.
The book stairs are a fabulous example of something I saw, wanted to do, and knew that I couldn't it real life... Can't Have it Big? Then make it in mini!!! The dresser that the tv sits on is a natural finish from Dollar Tree that I spray painted white, and the tv has The Vampire Diaries on it. Mmmmmm, Damon.
The room is loud with color, but still looks quite comfy and relaxing.
The design of this room makes me smile. everything just flows. :)
THE BOOK NOOK ROOM:
Everyone's favorite. Started out as a an intended kitchen that looked like this: Again, over painted, over glued, I actually liked the flooring, but it didn't go with what I wanted.
This was the first room I stared on and the first *I WANT IT* that came to fruition, in mini. The Book Nook. :) I added a random wood plank floor, custom shelving and over 200 books. I also nixed two windows!
All the titles are ones that I have read or would at least recognize. The blanket is from
Mary of Roslyn Treasures and Etsy. I made some of the pillows and some are souvenirs from my time with
Mini Jazzi.
I added a bean bag, based on a pattern for a hackey sack, and a crate to act as a table and shelf.
Reading quotes cover the walls and the shelves house more gifts from mini loving friends.
Hoo Hoo!!! Book ends by
Jane of minifanaticus.
THE BEDROOM and HALLWAY:
This was one of the hardest rooms for me to bash... I filled in a door, made a new door, and turned the big window into french doors. I didn't want the stairs to go straight up to the bedroom, so I added a narrow hallway.
The hallway is just wide and big enough for you to get into the bedroom and bathroom. I love the french froggy art. :)
This room houses all the rest of my international goodies. And since the Murphy bed takes up so much wall space, I decorated the back of it with pictures of postcards.
This room is a tribute to my desire to travel and all my mini friends, near and far. :)
There are gifts in here from Greece, Italy, Mexico, Chicago, NewJersey and more. :) All the fabric on the bed is from
April!
So clean when the bed is put away! I am so glad that I bought this rug before HBS discontinued it. :)
A peek into the hallway to see the stairs!
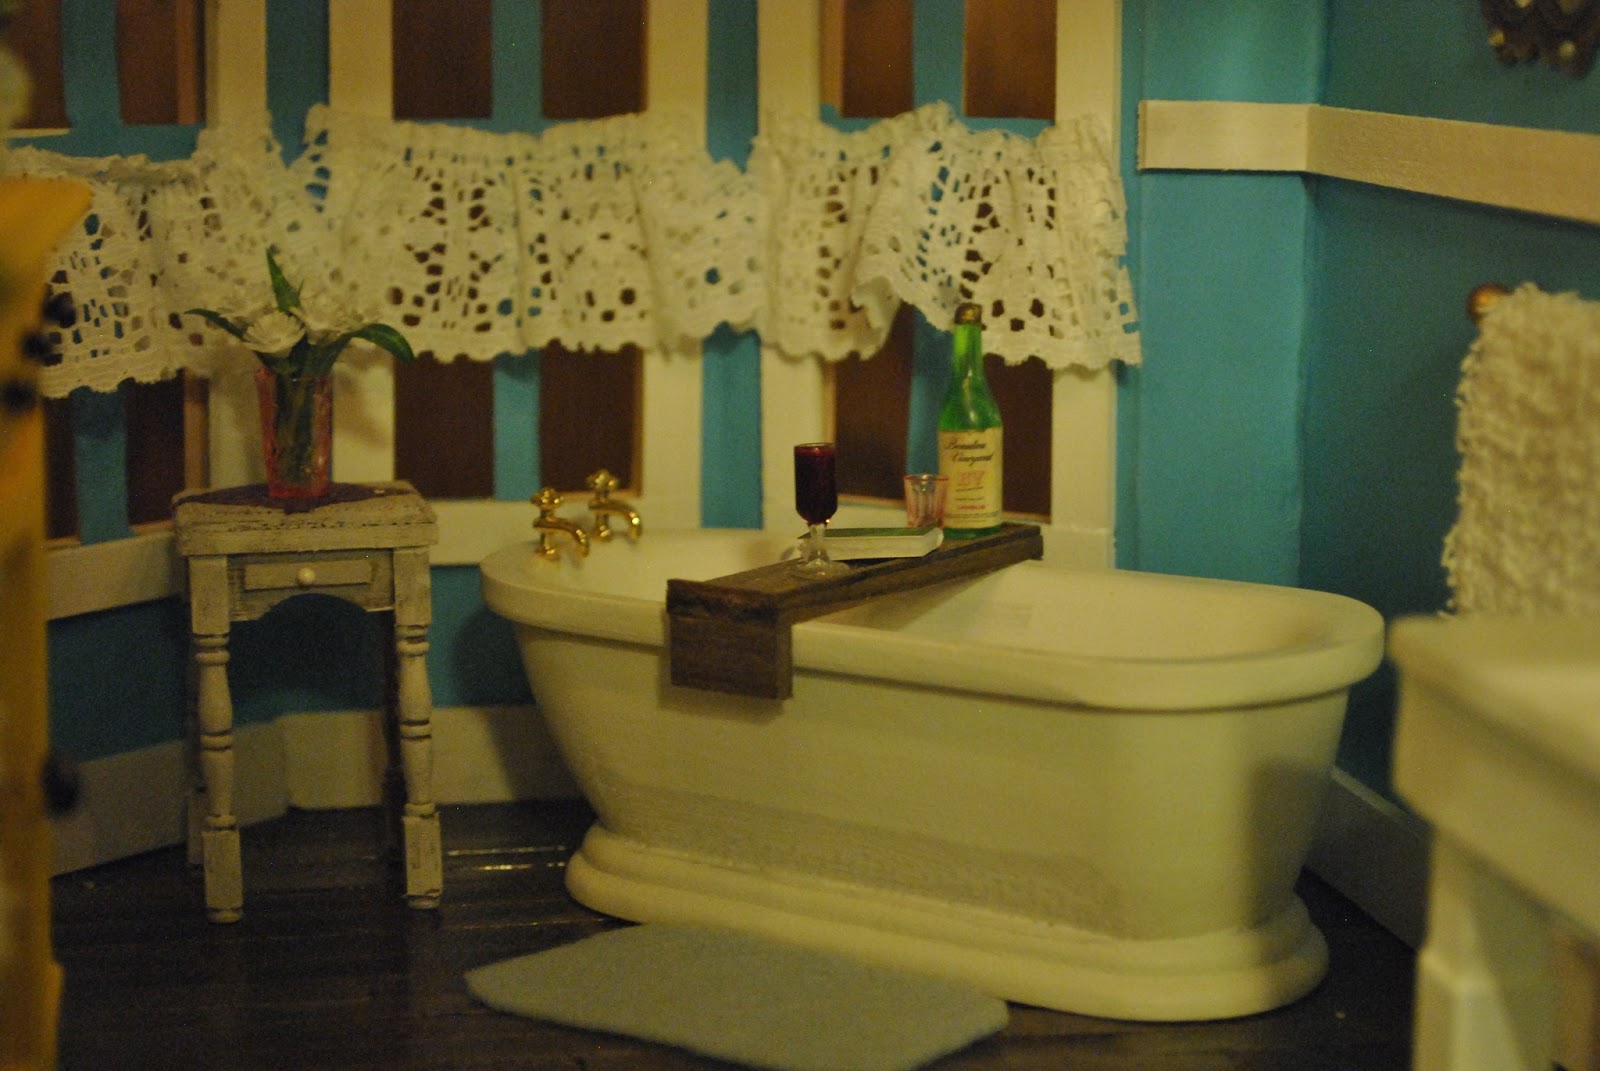
THE BATHROOM:
This room got the least amount of bashing... just added a new wall. Someone poor me a bubble bath, STAT!!!
LOVE. THIS. BATHROOM. There were a few things that didn't make the cut, since time was running out, but I will add them in the future. One thing that will get added, some how, is two sconces, either side of the square mirror... and then plumbing for the sink. I fully intended to, but never went and purchased tubing.
Now, if only I had one of these in my real home. I would never come out! Just call me Pruney!!!
All we have is a walk in shower.. not relaxing at all.
THE ATTIC:
I wanted the attic to be both the attic and the guest area... and the Tennyson has the perfect set up for that. I changed the windows on both sides, though. A new rectangle window and an octagonal window... that I apparently forgot to paint.... Let's just say it was recently replaced and the owner didn't want to worry about paint in the storage area. Ha!
I also gave it a really unique wall treatment in the back, but ended up scraping the idea of painted and worn wooden floors. I just got tired of cutting and measuring and sanding!
So it ended up with carpet on one side, and simulated MDF on the other (chipboard!).
I even did my first 1:144 kit! I will be painting this up and such in the future, but it will always live in the attic.
These piece here bothers the tar out of me, but I couldn't get it out without bashing in the roof, so I just worked around it and used the lip for storage.
Blankets are peeping out!!!
And, to make it all the more special, this house is the first that I have fully electrified. Fully wired, no battery lights and I even made some lights myself! It really looks so cool for it!
I hope you enjoyed following along with me on this build. I had so much fun and learned a lot. Remember, voting starts this Sunday at 8pm at
Little Victorian's blog. Check back then for a post with a link. Everyone has 3 votes, but only one vote per house! Congratulations to everyone else that is entering with me and goo luck!