It always seems, for me at least, that the layout never ends up quite how I intended it to, or the way I initially saw it, from the beginning. Originally, I wanted to include so much more on the outside! But my real life house is full of doors. And two, in particular, that the dollhouses need to be able to make it out of if we ever move.... Plus, I'm really running out of room to store these things....
As you can see, the pool was originally sideways... and the shower would have been on the backside of the hose. Plus, I had a really cool outdoor bar (something that was initially axed from the Mt Ollopa build). It got axed from here, too.
The base of the house was just too big. After a consult with my team of awesome friends, I moved the shower around to the side, turned the pool around and scaled down my plans for the pool deck. :( Even in mini, we can't have it all. Unless, of course, you marry some uber rich person that just has thousands of unused square feet in their gigantor mansion. o.O
The kitchen layout changed, too. I knew I wanted the back to be finished and removable, and with the house being so small itself, I didn't want furniture in the way...
After initial dry fit and mock up, I started with the floor. The grain of the kit wood was going in the right direction already and since this was a good quality laser kit (thank you Greenleaf!) I didn't see a need to cover it up with more wood.... So I just scored in some planks. You can click on the picture to see better.
I then gave it several washes of Warm White by Americana and weighed it down over night. While it was drying (I am missing a ton of pictures here, because I suck at taking the *stages* pictures) I worked on the bathroom. The flooring for it (which you can see in the picture below) is the bottom part of one section of privacy fencing. It got painted the same color as the main floor. I cut the bathroom walls out of two layers of mat board and papered them and glued them to the sides of the bathroom floor. It stayed a removable piece for a while.

For the outside of the building, I didn't have the same luck with the grain, so Rustic Clapboard Siding to the rescue! This is the same stuff that I used on Mt Ollopa. I did all the sides of the house this way, including the back wall, which I cut from the solid wood piece from the pier kit. You can see in the following picture, that I filled in part of the window. I had to change the dimensions a bit to allow enough height for the kitchen counters to be in front.
Once all the sides were dry, I took a razor knife and cut off all the excess siding at the edge.
My inspiration picture has board and batten siding- which I love- and I used the strips from the roof upgrade to make the segments. Perfection!! The Window and door trim is tacked in place with mini wax so I could make the proper cuts. In the final build, the door frame trim isn't there on the outside... I managed to lose it, and as you can see, it needed to be a very specific fit.
It looked so cool, even before it was painted!
To keep the wood from warping, I did the outside gluing and the inside priming and papering all at the same time. When it was all dry (yeah hair dryer!) it was time for another dry fit.
Looking pretty good! I will have to come back and let you know the names of the papers I used... I think Fishscales (blue) and Linen (cream) both by Recollections....And the green came from a large book....
Making the cross buck door wasn't too terribly difficult. I left the siding off this part and used just the kit wood as the backing. I used laser cut wood from the pier kit to make the parts. To make sure placement was right, I laid a fence section (meant for the shower) down on the board to keep me from getting too far over. I also made sure to pay attention to the siding pieces so that it wouldn't be butted up next to one of the strips.
Here are all the building pieces before painting them.
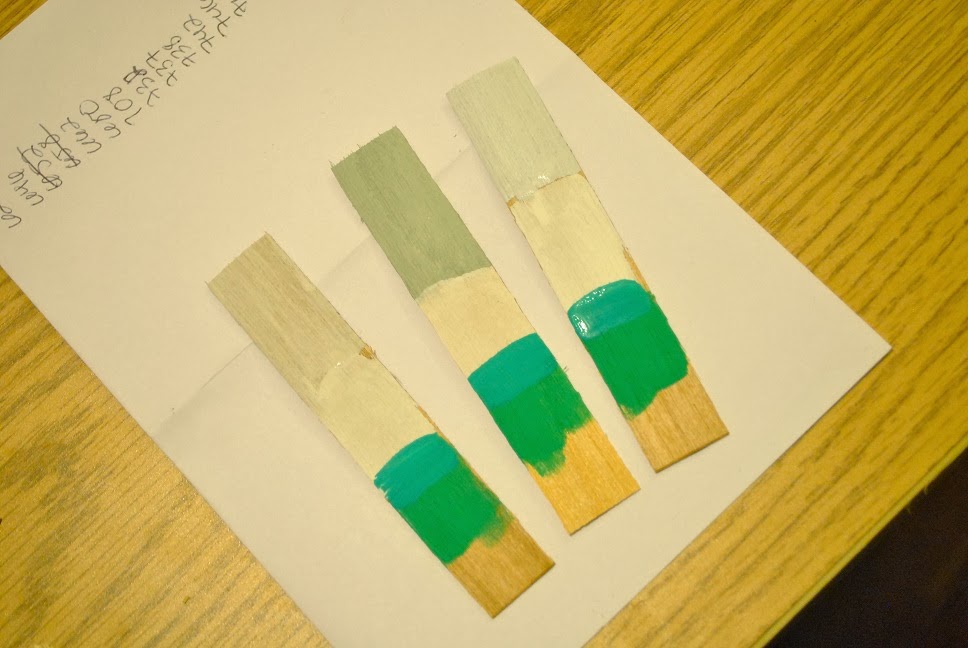
I find, that when choosing a color scheme, it helps to paint a swatch on the same sort of surface you will be using. So here are my swatches that I made on some the excess strip wood.

I chose to use Dusty Miller by Glidden for the main house color. Some time ago, Home Depot discontinued these and sold them for $.50 a piece down from $3.00. SCORE!! I bought, like, $30 worth for myself and my mother-in-law.
All the pieces for Dusty Miller got two coats.
All the white is Snow White (Titanium White) by Americana and the turquoise is a custom mix of turquoise, sour apple green and bluegrass green.
The screen door was sanded, painted and then assembled using Gorilla Glue, but only the tiniest amount. It was clamped shut over night.
You'll notice here, that I ended up switching the doors. That wasn't on purpose. They were supposed to go this way... but I think they a)fit better the other way and b) I must have decided they looked better.
My final shot for this post is to show you my super helpers for roof construction. These little silver bulls. They are really heavy for how small they are! A gift from a family friend, they were certainly meant to hold paper down... but I think the were bull enough to handle a really big job!
Be back soon with tutorial posts and more about the house build!


Wow. It's really awesome to see your process. The finished project is fantastic.
ReplyDeleteYour build is so amazing! I love all the details you added to it, I like how you planed out your landscape and house build together ;)
ReplyDeleteThose bulls are awesome, I just used coffee cups and whatever was infront of me ;P
Love the silver bulls. It is amazing what we can find to help us in our quest to make our mini items.
ReplyDeleteveo que esa casa va viento en popa, y seguro que la tienes terminada enseguida , y esos toros de plata son preciosos
ReplyDeletebesitos
Mari
It's a wonderful project. Thanks for sharing.
ReplyDeleteGreetings, Faby