Thursday, September 9, 2010
What? No tutorial pics?
Here is a quick post for you all. I am sorry that I didn't take more pictures to explain how I made this. It constructed out of foam core board and leather. The pillows are cotton and filled with birdseed, as usual. The feet are made from tiny sections of a wooden dowel I had laying around. The bottom is covered with a deep red card stock. Oh, and I used some foamy package stuff to make the cushions "squishy." Cut it all out last night and assembled it this morning. It will be listed on Etsy later!


Wednesday, September 8, 2010
Suffering Suckatash... Dang Flordia Squalls!!
Remember the front doors from the previous post? See how much work I must have put into them? So, I took them out in the garage on Monday and painted them a fabulous red brown color that had just enough POP and still looked great with the house colors. We had to go do work at the shop and had left them outside on the back porch to dry.
While we were gone, it rained on the end of town where we live and my doors got ruined. I am heartbroken. It was all sunshine and happiness at the shop! Stupid Florida squalls!!! It can literally be raining on one side of the street and not on the other OR just for a block it is pouring!
I have to start all over. :( Waaaaaaaaaaaahhhhhh!
While we were gone, it rained on the end of town where we live and my doors got ruined. I am heartbroken. It was all sunshine and happiness at the shop! Stupid Florida squalls!!! It can literally be raining on one side of the street and not on the other OR just for a block it is pouring!
I have to start all over. :( Waaaaaaaaaaaahhhhhh!
Saturday, September 4, 2010
Weekend #9: September 4th and 5th is massive mini weekend!
See, I promised at the end of the weekend I would have stuff to report on and pictures to share!! And, caution, this is a LOOOONNNNNNNNNNG post. :)
French doors. Stuff in garage. Front doors. Lamps. Balcony. Planter. I was hecka busy this weekend. Well.... this is just today, on Saturday. So. What to start with?
I had been working on the French doors first, so we can start there. These are actually from Houseworks, but with all the bashing I had to do to get them to fit, you probably wouldn't know it.

First, they had to come out of the casing trim (I'm sure that has a proper name that I just don't know) so I just had the doors to work with. I made sure to keep track of all 4 pins that would act as the hinges, allowing the doors to swing back and forth. Since there was cutting, there was also lots of sanding. Gosh, I really despise sanding! After they had received a good sanding, they got fitted into the door with a top and bottom trim. I carefully measured the gaps between the doors and the sides of the trim to make a new filler casing. That, too, was a pain. It was tiny slivers of wood, but it had to be done this way so that the doors would still work. Those pieces were cut and then the whole thing was glued, clamped and set off to the side to dry.

During drying time, I got to work on some of the stuff in the garage. I started with items that were not actually made by me: the washer and dryer. They will probably get a good bashing before I am through.... or at least thoroughly accessorized. Will need to make a hamper.... I had a potting table that I thought would look nice in here, but it turned out to be way to big in scale... I ended up bashing it into two pieces. I took the top part off and the table part off. I broke the table in half and used it to make two shelves. I then hung this on the wall above the washer and dryer to act as the laundering shelf. It will hold all the goodies for doing laundry.


The bottom half became a sort of work table. The table was very clean and shiny originally, and I didn't really care for the look. I decided to dinge it up a bit by taking a utility blade and slicing off chunks of the varnish and wood. When I was sure I had gotten enough off, I went back over the bare sections with walnut stain. It ended up giving the table a very "dirty" appearance. I added a piece of stained and dinged up balsa wood for the table top. Along with this table, I made a larger work table from balsa, dowels and skinny sticks. Both tables got pony beads for casters. The garage was looking small and James is forever wishing that his RL work tables had wheels on them for easy rearranging.
The peg board is made from a frame I had and some very thin balsa wood that I poked a zillion times with a stylus. It will have all sorts of tools on it. It will also feature this miniature drill from a tutorial I found. There will be many trips to the RL garage for inspiration!
The front doors got sanded and a window cut in them. I gave up trying to sand them perfect since the wood is so crummy AND there was so much spray paint on them. The windows got trimmed out with skinny sticks and the gaps filled with Elmers wood filler. Then there was a good sanding all around and a fresh coat of white paint. As of right now, I have yet to finish those....


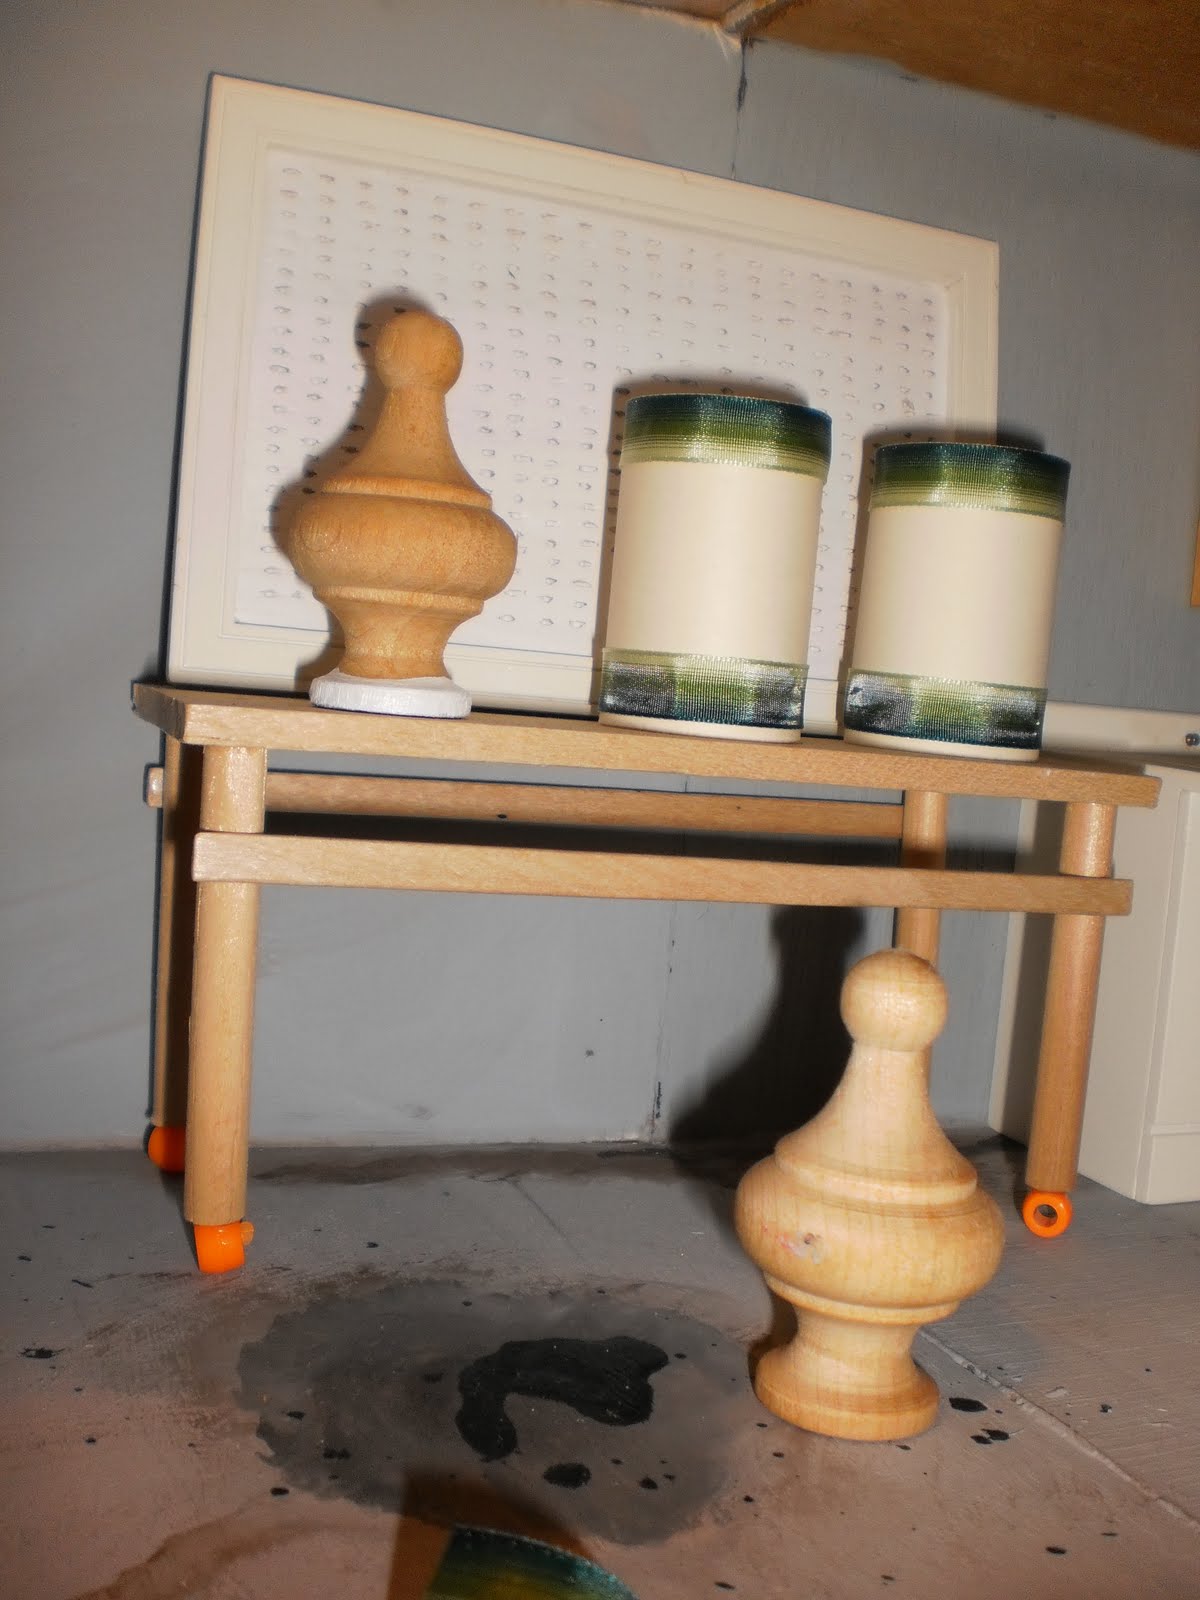
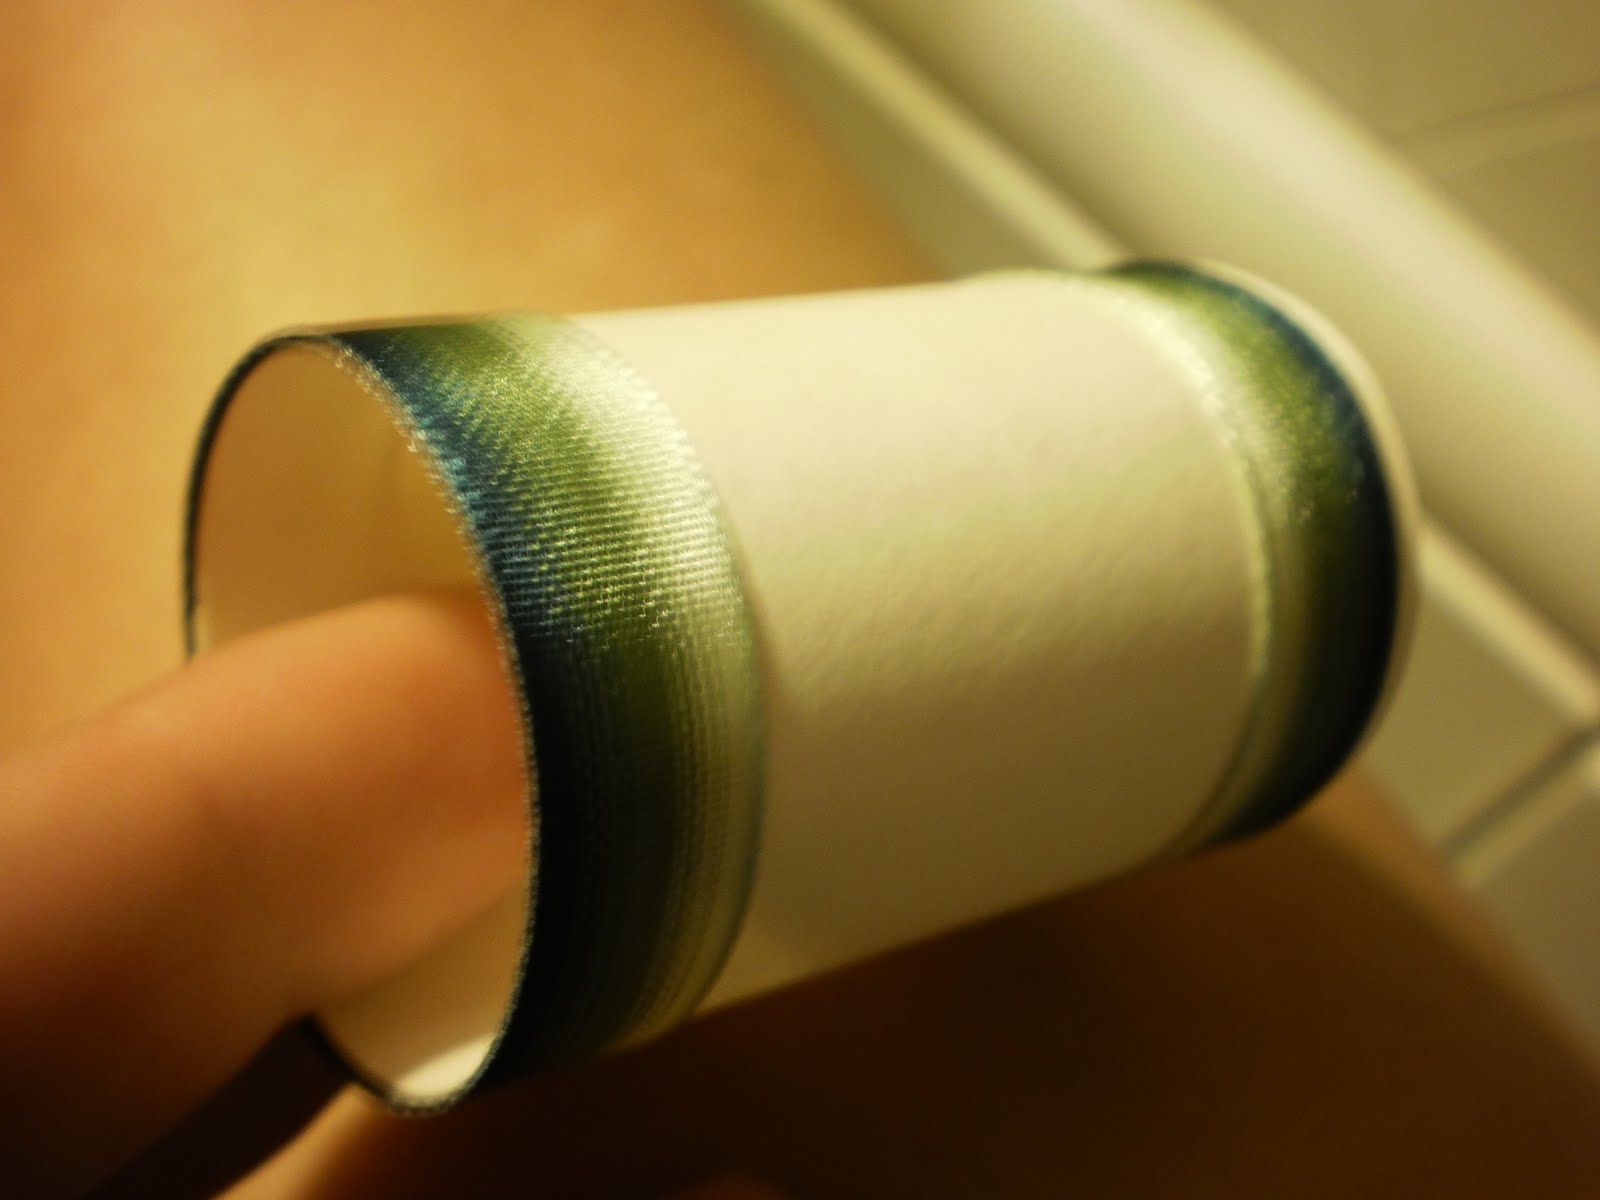
In some poking around, I made a couple lamps (still unfinished) from some wood turnings I found. I really like them and plan on putting them in the living room. I will need to find some other stuff like that or think of other useful components for the bedroom and study. That second picture there is for James' enjoyment. I had just set them in the garage to dry and he thought it was fun that there was work happening in there. :) The bases are going to get a couple coats of varnish. I like the wood look.

In the January, 1999 issue of Dollhouse Miniatures, I found a quick tutorial for an awesome planter. I really like how it turned out, too. My lines are nowhere near straight, but I think it gives it character to be all cockeyed. :)

Finally, my last project for the weekend was the terrace/balcony. After some input from my Mini Soul Sister, Brae (check out her blog here), I painted the French doors (but still have to decide whether or not to leave the mullions on.) The trim is painted the same brown that the rest of the trim is painted and the door is the same color as the house itself. The inside will match the white trim and wainscot of the study/den.

I was originally going to make the porch like the original design included on the Highland, but decided it was more aesthetically pleasing to the eye for the shape to resemble the silo. I used the top part of it as a pattern so the porch is not only the same shape, but the same size. It is a chunk of balsa (because it is light) that I carved planks into and stained with a mix of walnut and mahogany. The braces underneath are skinny sticks and it is secured to the wall of the house with these wood bracket things I had. I really like them!
The posts are made from some sort of attractive post I had. There were two of them, so it was perfect. I sanded the tops of them down flat and secured a dowel to the top of it. The roof is a duplicate of the floor and while one side is painted to match the trim, the other is shingled with real asphalt shingles. These were included in our phenomenal Craigslist find of the century. You can see those goodies here. The posts were glued into place in pre-punched holes and painted to match the trim. I also installed tiny hooks for hanging plants, feeders or windchimes!


After some time discussing it with some friends on the Greenleaf Forum, I am going to use a wrought iron looking railing. I don't have quite enough of what I need, so some of it will need to be replicated and fabricated on my own. Nothing I am not used to! :P
I wanted to get more done, but we spent the entirety of today over at a good friends house eating great Latin food, playing Domino's and watching the boys ride Powerwheels and splash in the pool. It was a great day.
Happy Labor Day everyone! Have fun and be safe. :)
French doors. Stuff in garage. Front doors. Lamps. Balcony. Planter. I was hecka busy this weekend. Well.... this is just today, on Saturday. So. What to start with?
I had been working on the French doors first, so we can start there. These are actually from Houseworks, but with all the bashing I had to do to get them to fit, you probably wouldn't know it.
First, they had to come out of the casing trim (I'm sure that has a proper name that I just don't know) so I just had the doors to work with. I made sure to keep track of all 4 pins that would act as the hinges, allowing the doors to swing back and forth. Since there was cutting, there was also lots of sanding. Gosh, I really despise sanding! After they had received a good sanding, they got fitted into the door with a top and bottom trim. I carefully measured the gaps between the doors and the sides of the trim to make a new filler casing. That, too, was a pain. It was tiny slivers of wood, but it had to be done this way so that the doors would still work. Those pieces were cut and then the whole thing was glued, clamped and set off to the side to dry.
During drying time, I got to work on some of the stuff in the garage. I started with items that were not actually made by me: the washer and dryer. They will probably get a good bashing before I am through.... or at least thoroughly accessorized. Will need to make a hamper.... I had a potting table that I thought would look nice in here, but it turned out to be way to big in scale... I ended up bashing it into two pieces. I took the top part off and the table part off. I broke the table in half and used it to make two shelves. I then hung this on the wall above the washer and dryer to act as the laundering shelf. It will hold all the goodies for doing laundry.
The bottom half became a sort of work table. The table was very clean and shiny originally, and I didn't really care for the look. I decided to dinge it up a bit by taking a utility blade and slicing off chunks of the varnish and wood. When I was sure I had gotten enough off, I went back over the bare sections with walnut stain. It ended up giving the table a very "dirty" appearance. I added a piece of stained and dinged up balsa wood for the table top. Along with this table, I made a larger work table from balsa, dowels and skinny sticks. Both tables got pony beads for casters. The garage was looking small and James is forever wishing that his RL work tables had wheels on them for easy rearranging.
The peg board is made from a frame I had and some very thin balsa wood that I poked a zillion times with a stylus. It will have all sorts of tools on it. It will also feature this miniature drill from a tutorial I found. There will be many trips to the RL garage for inspiration!
The front doors got sanded and a window cut in them. I gave up trying to sand them perfect since the wood is so crummy AND there was so much spray paint on them. The windows got trimmed out with skinny sticks and the gaps filled with Elmers wood filler. Then there was a good sanding all around and a fresh coat of white paint. As of right now, I have yet to finish those....
In some poking around, I made a couple lamps (still unfinished) from some wood turnings I found. I really like them and plan on putting them in the living room. I will need to find some other stuff like that or think of other useful components for the bedroom and study. That second picture there is for James' enjoyment. I had just set them in the garage to dry and he thought it was fun that there was work happening in there. :) The bases are going to get a couple coats of varnish. I like the wood look.
In the January, 1999 issue of Dollhouse Miniatures, I found a quick tutorial for an awesome planter. I really like how it turned out, too. My lines are nowhere near straight, but I think it gives it character to be all cockeyed. :)
Finally, my last project for the weekend was the terrace/balcony. After some input from my Mini Soul Sister, Brae (check out her blog here), I painted the French doors (but still have to decide whether or not to leave the mullions on.) The trim is painted the same brown that the rest of the trim is painted and the door is the same color as the house itself. The inside will match the white trim and wainscot of the study/den.
I was originally going to make the porch like the original design included on the Highland, but decided it was more aesthetically pleasing to the eye for the shape to resemble the silo. I used the top part of it as a pattern so the porch is not only the same shape, but the same size. It is a chunk of balsa (because it is light) that I carved planks into and stained with a mix of walnut and mahogany. The braces underneath are skinny sticks and it is secured to the wall of the house with these wood bracket things I had. I really like them!
The posts are made from some sort of attractive post I had. There were two of them, so it was perfect. I sanded the tops of them down flat and secured a dowel to the top of it. The roof is a duplicate of the floor and while one side is painted to match the trim, the other is shingled with real asphalt shingles. These were included in our phenomenal Craigslist find of the century. You can see those goodies here. The posts were glued into place in pre-punched holes and painted to match the trim. I also installed tiny hooks for hanging plants, feeders or windchimes!
After some time discussing it with some friends on the Greenleaf Forum, I am going to use a wrought iron looking railing. I don't have quite enough of what I need, so some of it will need to be replicated and fabricated on my own. Nothing I am not used to! :P
I wanted to get more done, but we spent the entirety of today over at a good friends house eating great Latin food, playing Domino's and watching the boys ride Powerwheels and splash in the pool. It was a great day.
Happy Labor Day everyone! Have fun and be safe. :)
Friday, September 3, 2010
Post birthday celebration
So, remember my grand desire to get LOADS done on the house? Nearly FINISH the exterior?! Bahhhahahaha. LMAO. What crack was I snorting? I think, all I accomplished was the set of French Doors for the balcony, and they aren't even completed! Still all taped up from glue drying. Oops! So I will not show you pictures, yet.
I did get some rad stuff though! I hit the thrift stores with my sister and came away with some great fabrics. I'm itching to make a zillion sofas, but I need to stay on track!
Birthday loot included: a ton of kitchen stuff from mis padres. I am always needing new kitchen gadgets and there were several things that didn't make it out of my room mates clutches before James and I got together. I have steadily had them replace these items with cooler, better versions. I also got a full four panel set of Eclipse curtains from them. Hooooorrrrraaaaaaaaaay! I love those curtains. Hopefully, they will do their job and save me some green at the end of the billing cycle. The electric bill has been murder this summer. They had also come across a wood carving kit that Mom thought would be good for my mini creations. She is probably right! There gifts were topped off with a pair of Tone Ups, by Sketchers. Heavenly comfortable sandals they are. :)
My awesome rocking sister took me shopping and I made a killing: tons of fabric, yarn, trim, wooden boxes, paint, clothes, make up, dyed my hair, fabulous lunch at Moe's Burritos, a giant blanket that feels like a cloud, yoga kit, books, books, books, old school Disney movies and then she topped it all off with Date Night. Loved that. James and I haven't been out in over a year!!! We grabbed some cheap dinner (Taco Bell deal meal) and a RedBox movie, took a drive in his baby (Miata) and had a private drive in with the portable DVD player. Heaven.
Now, to get myself into gear to work on the Highland this weekend! Tomorrow, I think. Sunday is being consumed with BBQ. Yum!
I will have some sort of eye candy by weekends end. I so solemnly swear. ;)
I did get some rad stuff though! I hit the thrift stores with my sister and came away with some great fabrics. I'm itching to make a zillion sofas, but I need to stay on track!
Birthday loot included: a ton of kitchen stuff from mis padres. I am always needing new kitchen gadgets and there were several things that didn't make it out of my room mates clutches before James and I got together. I have steadily had them replace these items with cooler, better versions. I also got a full four panel set of Eclipse curtains from them. Hooooorrrrraaaaaaaaaay! I love those curtains. Hopefully, they will do their job and save me some green at the end of the billing cycle. The electric bill has been murder this summer. They had also come across a wood carving kit that Mom thought would be good for my mini creations. She is probably right! There gifts were topped off with a pair of Tone Ups, by Sketchers. Heavenly comfortable sandals they are. :)
My awesome rocking sister took me shopping and I made a killing: tons of fabric, yarn, trim, wooden boxes, paint, clothes, make up, dyed my hair, fabulous lunch at Moe's Burritos, a giant blanket that feels like a cloud, yoga kit, books, books, books, old school Disney movies and then she topped it all off with Date Night. Loved that. James and I haven't been out in over a year!!! We grabbed some cheap dinner (Taco Bell deal meal) and a RedBox movie, took a drive in his baby (Miata) and had a private drive in with the portable DVD player. Heaven.
Now, to get myself into gear to work on the Highland this weekend! Tomorrow, I think. Sunday is being consumed with BBQ. Yum!
I will have some sort of eye candy by weekends end. I so solemnly swear. ;)
Tuesday, August 31, 2010
Happy Birthday, to MEEEEEEE!!!!!

Agh! I am 25! If I had the cash, I would totally go rent a car. An AWESOME car, just for the sake of being in an awesome car. Bwahhahahaha! So, birthday celebration started off with gift from DHM... On top of dollhouses galore, I got $50. I very quickly rushed out and got stuff to help me enjoy my day "off" tomorrow. (DH is tending to the kids all day, WAHOO!!!) I got: a sander and sandpaper, new blades for the utility knife, tile samples, couple sheets of lauan plywood, Glidden paint samples, fabulous black fabric, wood to make a shelf, and a dremel doodad. Top that off with the gifting of loads of books, fabric, trim and FIMO from my good friend Marilou, and I am one happy clam dedamn! Sure am!
When I got back, James and I enjoyed a quiet dinner (Marie Calender's Chicken pot pies) with drinks (good ol' young person rum and coke) and dessert (brownies with ice cream). I am hoping to finish out the night with a bit of minis and a movie, maybe.
Tomorrow, I am going to mini the day away! The plan is to knock out the exterior of the Highland. French doors, balcony, flower boxes, garage door, front door, porch and roof. LOL. We will see how that goes. I desperately need to clean off my desk though. It looks just like it did a few days ago. Come on, Lyssa! Get off that keester and do it! I have high hopes for the day though.
So, we will see how it goes.
Sunday, August 29, 2010
Weekend #8: Trimming, what a PAIN!
This poor house was actually spray painted at one point, so everything was sort of painted together and large drips were everywhere.... And it appears that they used a mixture of glues on the outside. Some places it held [b]really[/b] well and in others, it was clearly falling off... This obviously meant that they should NAIL the siding onto the house!!!
OMFG!!!!!
So, nearly everything on the exterior was obliterated and in desperate need of replacing. I am grumbling about this so fervently because combine all that nonsense with my lacking existence of cash (where's Robin Hood when you need him?!) and absolutely no proper trim or window casings and I discover that I am reduced to using craft sticks. Doh!
This doesn't sound like a big deal, but craft sticks are only so long... so this means measuring: BORING. Cutting: BORING. Sanding: BORING. Gluing: BORING. Clamping and waiting to dry: BORING TIMES A BILLION. Filling with wood filler: BORING AND MESSY. Waiting for wood filler to dry: BORING Sanding: OMG. BORING BEYOND BELIEF. (BBB) *goes to bang head against desk... but desk is still messy, so we opt for face first flop on the bed*
Stages of boring:


Finally get all that done with and then we can pick out the color. I decide to make one up because nothing I have is good enough. I end up with a mix of Nutmeg brown, Crimson red and Mars black. This all turns up a chocolate brown with just the faintest hint of red too it. I heart it. Now round and round the trimming we go with the paint. By the time I had finished the last part on the house, the first part was dry and ready for a second coat. I ended up doing 3 coats on everything but the floor for the porch. It will eventually look like worn wood planks. The results of the dark color are amazing and I am very pleased!
So... maybe boring is worth it?!


Not ready to be done yet, I moved onto the garage portion of the house. This got it's own mixture of gray for the floor, a bluish gray for the walls and a wash of the custom brown to make it "dirty." Then, I went in and made oil stains and topped off the stain area with some fresh spilled gross-tastic oil. Otherwise known as Glossy Black. :) The door got some white and the final wall got a bit of paper to add a little punch. This will be filled with all sorts of garage stuff!


So the next step is to do the garage door and fill the garage. The windows need to be placed and the doors need to be sanded, trimmed, cut and painted. I am thinking about making them a really fun, off the wall color. I also need to attach the balcony (after some French doors are made) and deal with the sun porch over the garage. Last touches will include shingles and landscaping, and then it'll be back onto the interior!
OMFG!!!!!
So, nearly everything on the exterior was obliterated and in desperate need of replacing. I am grumbling about this so fervently because combine all that nonsense with my lacking existence of cash (where's Robin Hood when you need him?!) and absolutely no proper trim or window casings and I discover that I am reduced to using craft sticks. Doh!
This doesn't sound like a big deal, but craft sticks are only so long... so this means measuring: BORING. Cutting: BORING. Sanding: BORING. Gluing: BORING. Clamping and waiting to dry: BORING TIMES A BILLION. Filling with wood filler: BORING AND MESSY. Waiting for wood filler to dry: BORING Sanding: OMG. BORING BEYOND BELIEF. (BBB) *goes to bang head against desk... but desk is still messy, so we opt for face first flop on the bed*
Stages of boring:
Finally get all that done with and then we can pick out the color. I decide to make one up because nothing I have is good enough. I end up with a mix of Nutmeg brown, Crimson red and Mars black. This all turns up a chocolate brown with just the faintest hint of red too it. I heart it. Now round and round the trimming we go with the paint. By the time I had finished the last part on the house, the first part was dry and ready for a second coat. I ended up doing 3 coats on everything but the floor for the porch. It will eventually look like worn wood planks. The results of the dark color are amazing and I am very pleased!
So... maybe boring is worth it?!
Not ready to be done yet, I moved onto the garage portion of the house. This got it's own mixture of gray for the floor, a bluish gray for the walls and a wash of the custom brown to make it "dirty." Then, I went in and made oil stains and topped off the stain area with some fresh spilled gross-tastic oil. Otherwise known as Glossy Black. :) The door got some white and the final wall got a bit of paper to add a little punch. This will be filled with all sorts of garage stuff!
So the next step is to do the garage door and fill the garage. The windows need to be placed and the doors need to be sanded, trimmed, cut and painted. I am thinking about making them a really fun, off the wall color. I also need to attach the balcony (after some French doors are made) and deal with the sun porch over the garage. Last touches will include shingles and landscaping, and then it'll be back onto the interior!
Friday, August 27, 2010
I've Gone Etsy!!
I just opened my own store on Etsy! The game plan for it is to make OOAK miniatures for other people at an affordable price.
All the time, I am seeing mini's online that I absolutely love.... but then nearly have heart failure from the price tag, which is quickly followed by sadness. I realized, I am a fairly crafty person and I think I can make these things myself. And you know what, I could! I did. And now I have them available for others to purchase from me. I am going to try really hard to never sell anything over $25 and I will happily take custom orders.
All that is on there right now are two sets of quilts and pillows, as is the Xbox. I plan on eventually adding some furniture, pillows, the paper clay toilet, the scratch built stove, the easel (in both clean and "used" states).... I will also have smaller items like paint tubes, brushes, the smock.... basically, anything that I have talked about making on here, I will duplicate and sell for your pleasure!
I love doing this to help out other miniaturists AND I think it would be a great way for me to bring in a little extra money for the kiddos. So go take a look!
www.LyssasBudgetMinis.etsy.com
All the time, I am seeing mini's online that I absolutely love.... but then nearly have heart failure from the price tag, which is quickly followed by sadness. I realized, I am a fairly crafty person and I think I can make these things myself. And you know what, I could! I did. And now I have them available for others to purchase from me. I am going to try really hard to never sell anything over $25 and I will happily take custom orders.
All that is on there right now are two sets of quilts and pillows, as is the Xbox. I plan on eventually adding some furniture, pillows, the paper clay toilet, the scratch built stove, the easel (in both clean and "used" states).... I will also have smaller items like paint tubes, brushes, the smock.... basically, anything that I have talked about making on here, I will duplicate and sell for your pleasure!
I love doing this to help out other miniaturists AND I think it would be a great way for me to bring in a little extra money for the kiddos. So go take a look!
www.LyssasBudgetMinis.etsy.com
Subscribe to:
Posts (Atom)