Saturday, June 25, 2011

Ageless Promise: A Gallery and Studio - Spring Fling 2011

*****It is my goal later on in life to open a gallery and studio for the community to teach people how to paint and draw and sculpt; give kids, young adults and adults alike, a safe space to create and express themselves. I also want to give the undiscovered and unsupported artist a chance to show their creations off in a professional setting with opportunities to be *discovered* and make sales. As an artist myself, I know how hard it is and how discouraging it can be to get your foot in the proverbial door. Since it isn't something I could conceivably achieve at this moment, I decided to make it in miniature, and I think the results are glorious. The name Ageless Promise comes from my deep seeded belief that anyone, of any age, can produce beautiful works of at art at any time, even if they have never put brush to canvas before. I believe, that everyone holds artistic promise and has an undiscovered potential, no matter the age. ******


The moment you all have been waiting for! The grande unveiling of my Spring Fling build! Hold your horses though, because I have some background information first. No cheating and zooming to the pictures!!!! I mean it!! Get your finger off the scroll button!!!

I came up with this idea for this kit as soon as I saw the kit release in March. I have been wanting to do a gallery with an onsite student studio for quite some time now. I had seen kits that suggested they would work well with it, but none that screamed: I AM A GALLERY! at me, until this new kit. The idea came to me quick, along with color schemes, which parts to use, what to make... I could hardly keep up with the creative process that was in my head. I feverishly ordered everything I needed and then proceeded to check my email, like, every five minutes waiting for Greenleaf to say that they had shipped it. I was pretty cranky by day 2 and no shipment and I was downright crotchety and snarky by day 7.... I was reading all over the forum how people had already received theirs (but ordered after me) and putting it in dry fit. WHERE WAS MY KIT?!?!??! Surely, I would not have enough time to finish if they did not get it to me soon! (Take note, I am writing this more than a week ahead of the deadline, so clearly, I had enough time.)

When it did finally get here, I was elated! And I put the whole thing into dry fit within an hour. :] Did I mention that I LOVE laser cut wood? I feel so sad for the 3 die cut kits in my craft room. :[ I will be cursing them with my splinter ridden fingers and piles upon piles of sandpaper.

So. I suppose I will just show you the finished product first and then there will be a series of posts about the process. The very long, long process. I learned quite a bit with this experience though. For example, watered down wood filler makes a FABULOUS mini stucco. It really is better to measure twice and cut once. It is a ton easier to paper/paint BEFORE you build. MDF is a fabulous wood for a base, but I am not sure I would use it for a house...

And as a tid bit of important information. nearly EVERYTHING in this house is hand made by me with a few exceptions:
1)BMW out front is something I borrowed from James.
2)Metal statues are painted Monopoly pieces.
3)Display shelf is an original mini from Ann of Amazing Miniatures
4)Hanging origami cranes are also from Ann.

Everything else, is scratch built or bashed by me, including all the tiny paintings. They are all original works of art and I used an actual paintbrush and acrylic paint on tiny canvas. :]


The front-left view of Ageless Promise:

The back-right view of Ageless Promise:


The studio addition:


The supply room:


Bottom floor Gallery, left side:


Bottom floor Gallery, right side:


Top floor Gallery:


Sunday, June 12, 2011

Rolling Window Shade Tutorial

Enjoy!


Items Needed:

a few clamps (clothespins and balloon weights work well)
card stock of your color choice
patterned paper of your choice
a small dowel
a toothpick
tacky glue
craft glue stick
scissors
straight cutter (or something to ensure you get a straight cut)
embroidery thread

Step 1:
Measure your window from outer edge of frame to outer edge of frame. Cut your dowel to this length. If your window is bigger than the length of a toothpick, substitute a smaller diameter dowel, of an appropriate length.

Step 2:
Decide if you want your shade all the way down or how partially down you would like it. From here on, I will have a partially down window shade. You will need to cut a piece of the card stock that is just (1/8"-1/4") narrower on each side of the dowel.
Example: If your dowel is 3" then cut your paper between 2 1/2"-2 3/4" wide.

I cut my paper 2 1/2" x 3" for this tutorial.


Step 3:
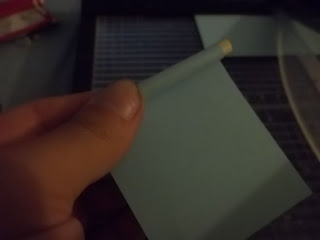
Dry roll the paper around the dowel to give a started curve. This makes it much easier, I promise! Run some tacky glue and smooth it out down your pre-rolled curve. Wrap this around the dowel and hold firmly. Use a toothpick to put a bit of glue on the top back edge of the paper. Roll it a little bit more and then clamp.


Step 4:
While that is drying, cut your second paper or fabric to size matching the length of unrolled paper. You can go from edge to edge or you can leave a sliver on each side of the secondary fabric to show the card stock ( I prefer this look.)


Step 5:
Un-clamp the rolled part and use the Craft Glue stick (I use an Elmer's one. The tube is orange and you can find it at Walmart in the scrap booking aisle) to apply glue on the flat part of the paper (what will be the shade). Glue down your secondary paper/fabric.


Step 6:
At the bottom of the shade, glue the toothpick or smaller dowel using a thin strip of tacky glue. Wait for this to dry.
*** You can choose to leave it this way OR you can roll it up, glue and clamp OR you can skip this and use the next step.

Alternative Step 6:
Cut a small strip of paper same width as the shade but maybe only 1/2" tall. Glue the toothpick or small dowel to the bottom and roll up, (same as the beginning steps of the shade) leaving some paper exposed for the next step.


Step 7:
Use tacky glue to attach the strip of paper to the back of the shade, making sure that the edge of the shade is pushed up slightly under the paper rolled toothpick.


Step 8:
Tie a small slip knot in on the end of the thread. Cut off the excess length from one end of the knot. On the other end, cut about 1" or so. Put some glue on the long end and then attach to the back of the shade, creating a pull down string.


Ta-da! A pull down shade. :)


Another peek!

And a tutorial when I get the time. :)

I made these for my window(s) in the Spring Fling. Not sure which one(s) I will use, but I totally love them!


I took the pictures kind of late, so I apologize for the darkness to it.


Wednesday, June 1, 2011

34 Days to Go!

Usually, by now, fans of Greenleaf's Spring Fling would be drooling massive amounts all over their keyboards. Since Dean changed the deadline this year, we are all going through a bit of *eye candy withdrawal* and it was suggested that there be a few more teasers sent out into the ether. :)

Here is mine:


There has been some speculation as to what I am doing. Hippie crash pad, retro disco, a kindergarten, funfair.... All of which are fabulous ideas. But are they correct?!

Stay tuned to find out more and be ready for the post on July 5th when I do the BIG REVEAL. It will be huge so make sure you come with sustenance. ;)

Thursday, May 19, 2011

Time a peek at the fling?

So, would you believe I am far enough along that this is all I can show you?!?! Everything else would give away major WOW details for the outside or accessories on the inside that would give away exactly what I am doing.

Here is a door that is stained Miniwax Bombay Mahogany and a door knob that I scuffed up and painted silver. I really despise that garish brass they come in. Blech.


Trying something new

There had been a lot of talk about people making spiral staircases on the Greenleaf Forum and I thought, why not? I gave it a shot, and this is what I came up with. I will probably use it on one of the many many kits I have lying about. :) Or in the fling. Not sure.

Here it is: Houseworks ballasters, a dowel with straw spacers, basswood steps, fun beads for decor and tiny silver chain. It was a lot of fun and next time, it could use a little bit of tweaking...

Remember to tell me what you think!


Minis from Roma!!

I recently participated in a swap over at Dale's Dreams and I got my package from Sonya not long after Mother's Day. You can check her stuff out here at her blog. Too cute!


I was happy to get such a well packaged gift. I always worry about mini's traveling, but these made it quite safely. Sonya sent me a cute little blue and yellow basket with goodies in it that I totally love! The bottles are so cute and shabby, but totally realistic. I love it and I can't wait to eventually set them up in the Highland. ♥


She also sent me a Rome souveniour kit, that from what I gather, is based off of stuff from a movie? Correct me if I am wrong Sonya. :)

It includes a table poster, a box, a bunch of teeny postcards, a book and... a tiny VESPA!!! I love it! What fabulous little minis. Thank you so much Sonya!


Now check out this fabulously tiny postcard! I think they will all have to be pasted around a mirror along with other Italian memories. ;)


I used directions from Ann over at Amazing Miniatures to make a photobox to take pictures of these. Go over there to check out this awesome, totally helpful post about making your own box at home to take fabulous pictures. :)